EduCtrl is a feature-rich cloud-based software to manage all aspects of Overseas Education Consultancy Business, Training/Coaching Institutions.
+91-924-213-7092
Give us a call
info@eductrl.com
Drop us email
Setting Up SMS Alerts
This article explains how to configure SMS alerts in EduCtrl CRM, including integrating your SMS provider, setting up templates with template IDs, enabling triggers, sending bulk messages via Broadcast, and automating SMS delivery using workflows and campaigns.
Prerequisites
- Admin access is required
- SMS Gateway must be configured under Settings > SMS
- SMS Notifications must be enabled
- (Optional) Approved template ID may be required in some countries
Step-by-Step Instructions
Go to Settings > SMS
Navigate to the Settings section and open the SMS page.
Select your SMS provider (Twilio, Textlocal, Gupshup, etc.) from the dropdown.
After selecting the provider, enter the required fields: Sender ID, Auth Key, and Flow ID.
Check the Enable SMS Notifications box at the top.
Click Save.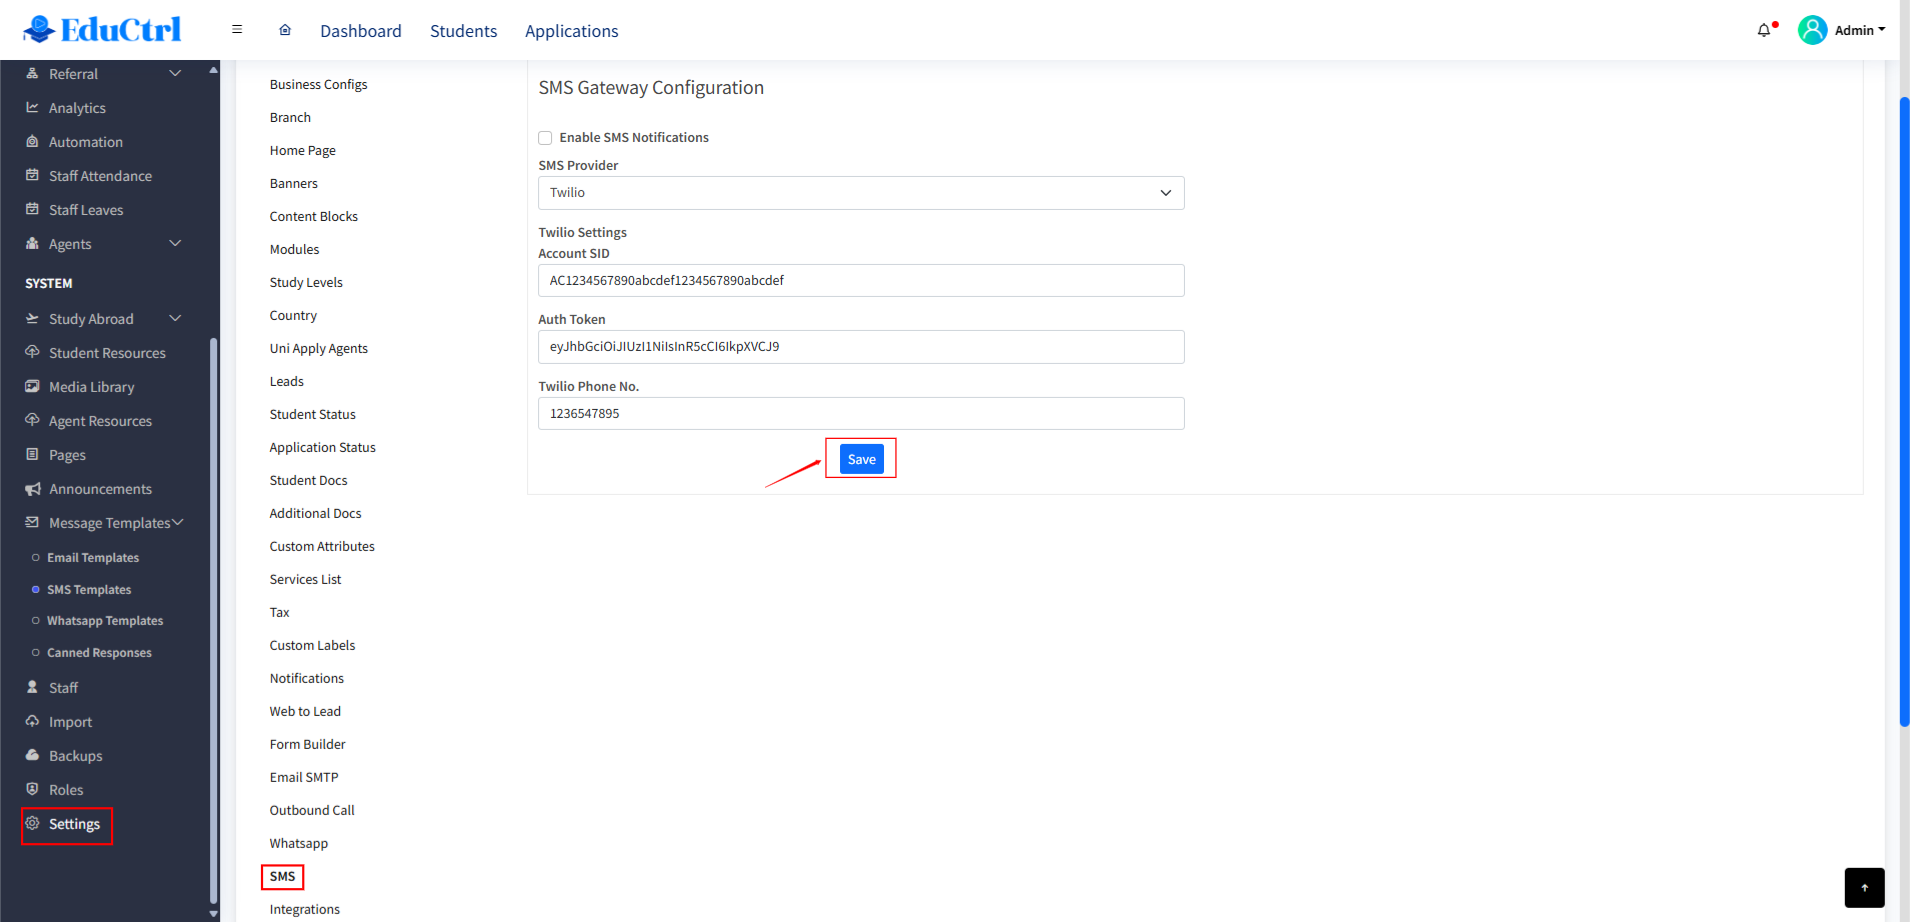
- Configure SMS Templates
Go to the SMS Templates tab under Message Templates.
Click Add New.
Enter the Title, Template ID (if required), and the Message content.
Each event-based SMS must have a corresponding template.
You can enable or disable any template by clicking the Status button.
Use Edit to update a template or Delete to remove it. - Enable SMS Triggers
Under the Settings > Notification section of SMS Settings, enable SMS alerts for specific events by checking the relevant boxes.
Common SMS triggers include:- New Lead Assigned
- Follow-up Reminder
- Payment Confirmation
- Document Submission
- Use Broadcast to Send Bulk SMS
Go to the Broadcast section from the left-hand menu.
Select the target group from the dropdown (Students, Staff, or Agents).
Choose SMS as the notification method.
Select the desired message template and click Continue.
In the next tab, you can:
- View total contacts
- See recipient email and mobile numbers
- Preview the message
Click Send to deliver the SMS. - Send Automatic Messages Using Workflow Automation or Campaign
Go to Automation > Workflow.
Click + New Workflow to create a new automation.
Enter the following details:
- Title
- Workflow Type (select Lead Nurture Sequence, Message Sequence, or Specific Event)
- Send (choose SMS from the dropdown)
- At (choose the time of day the message should go)
- Target (select the user group or list)
- On (Date) (enter the date when the SMS should start)
- Send Message (select a predefined SMS template)
- After (Days) (add any delay if needed)
Click Submit to activate the workflow.
On the same page, you can also create a Campaign by selecting Campaign as the workflow type. Campaigns allow you to send a sequence of SMS messages, emails, or other notifications over time to nurture leads or engage with students, agents, or staff. You can monitor campaign performance and adjust timing and messages based on responses.
Tips and Best Practices
- Make sure you have sufficient SMS credits
- Use approved template IDs for regulated regions
- Use Workflow Automation for time-based or event-triggered messages
- Use Campaigns to send a series of messages as part of a communication plan
- Test workflows and campaigns with internal contacts before launching to real users
Troubleshooting or FAQs
Q: My automated SMS messages or campaigns are not working. What should I check?
A:
- Ensure the workflow or campaign is submitted and active
- A valid message template must be selected
- SMS provider must be correctly configured
- Check date, timing, and conditions in your setup
- Make sure the recipients have valid mobile numbers
