EduCtrl is a feature-rich cloud-based software to manage all aspects of Overseas Education Consultancy Business, Training/Coaching Institutions.
+91-924-213-7092
Give us a call
info@eductrl.com
Drop us email
Uploading and Managing Student Documents
This article provides a step-by-step guide for staff and administrators on how to upload and manage student documents within EduCtrl CRM, ensuring that student records are organized, complete, and easily accessible.
Prerequisites
- Staff or admin access with document management permissions
- Student profiles must exist in the system
A. Uploading Student Documents
- Log in to your EduCtrl CRM account.
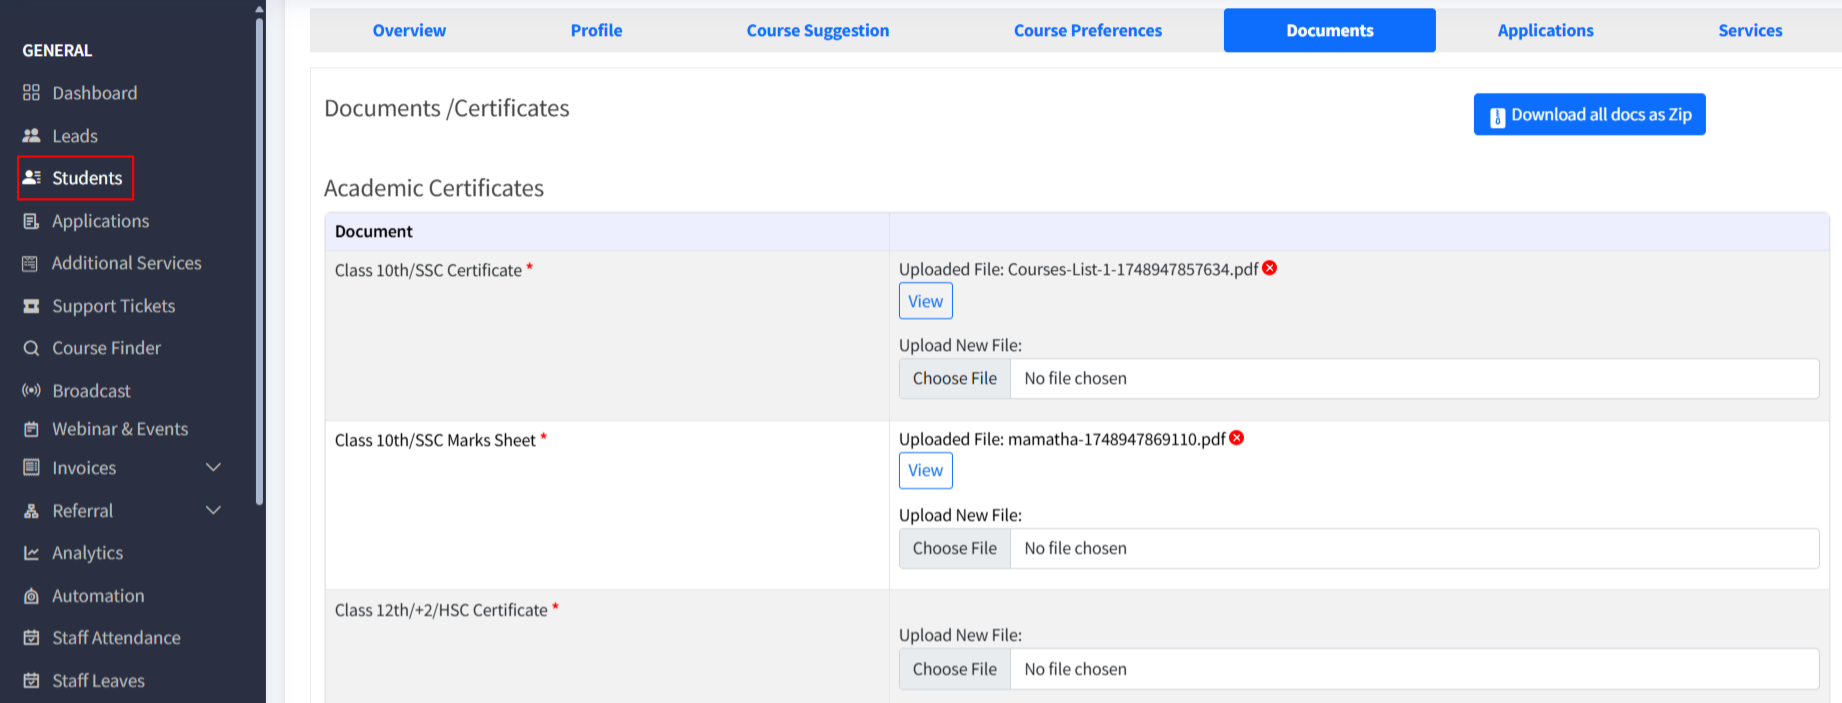
- Navigate to the Students section and select the desired student profile.
- Go to the Documents tab.
- Click on Upload Document.
- Choose a file from your computer. Supported formats: PDF, JPG, PNG.
Select the appropriate document type from predefined labels, such as:
- SSLC
- PUC Certificate
- Passport
- Academic Certificate
(Additional types may be configured by your admin.)
Click Save to upload the document.
B. Managing Uploaded Documents
- View: Click any document to preview or download it.
- Delete or Replace: If permitted, delete or upload a new version of the document.
- Download All: Use Download All as ZIP to get all documents in one archive.
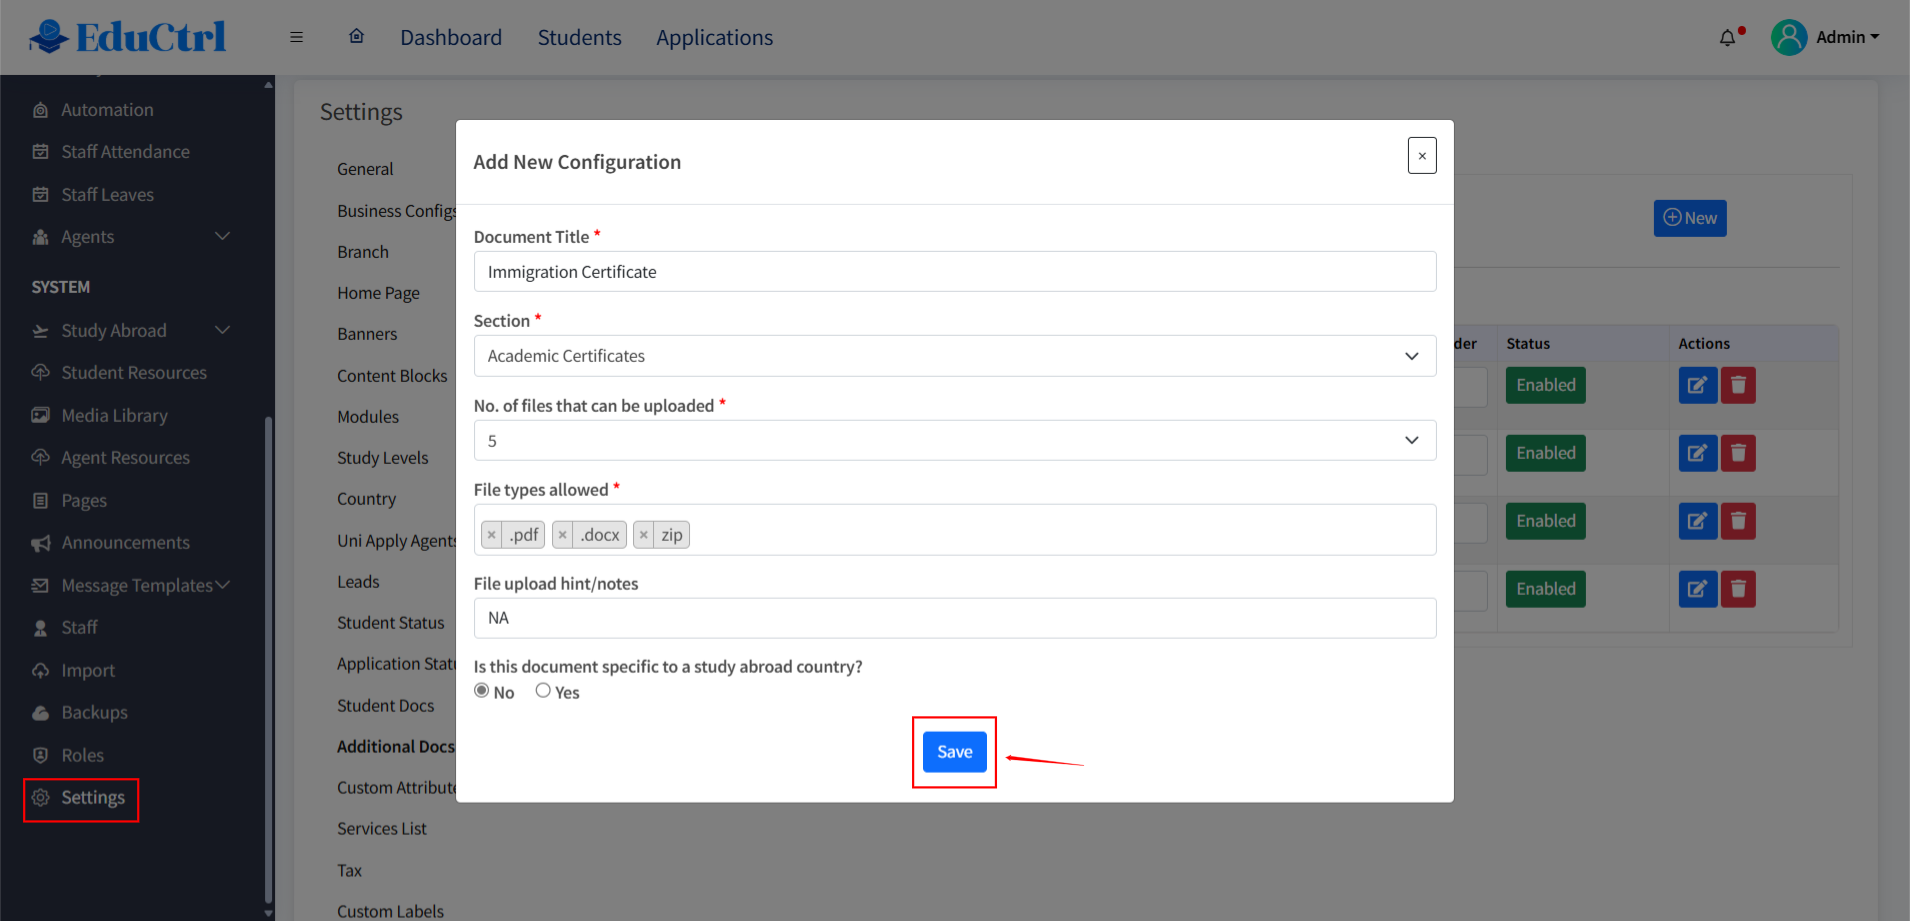
Additional Document Configuration
Admins can configure custom document rom Settings>Additional Doc ,types with the following settings:
- Mandatory/Optional: Define if a document is required.
- File Types Allowed: Restrict uploads to specific formats.
Destination-Specific: Set document requirements based on target countries.
Best Practices
- Use clear and consistent file names.
- Always choose the correct document type.
- Update documents regularly to reflect current student status.
- Encourage students to submit required documents early and verify file quality.
