EduCtrl is a feature-rich cloud-based software to manage all aspects of Overseas Education Consultancy Business, Training/Coaching Institutions.
+91-924-213-7092
Give us a call
info@eductrl.com
Drop us email
Setting Up Custom Lead Stages
EduCtrl CRM allows administrators to define custom lead stages to reflect the organization’s unique sales process. Proper configuration helps in streamlining follow-ups and lead tracking.
Step-by-Step Instructions
- Go to Settings > Leads
Click on Add New Status to create a new lead stage
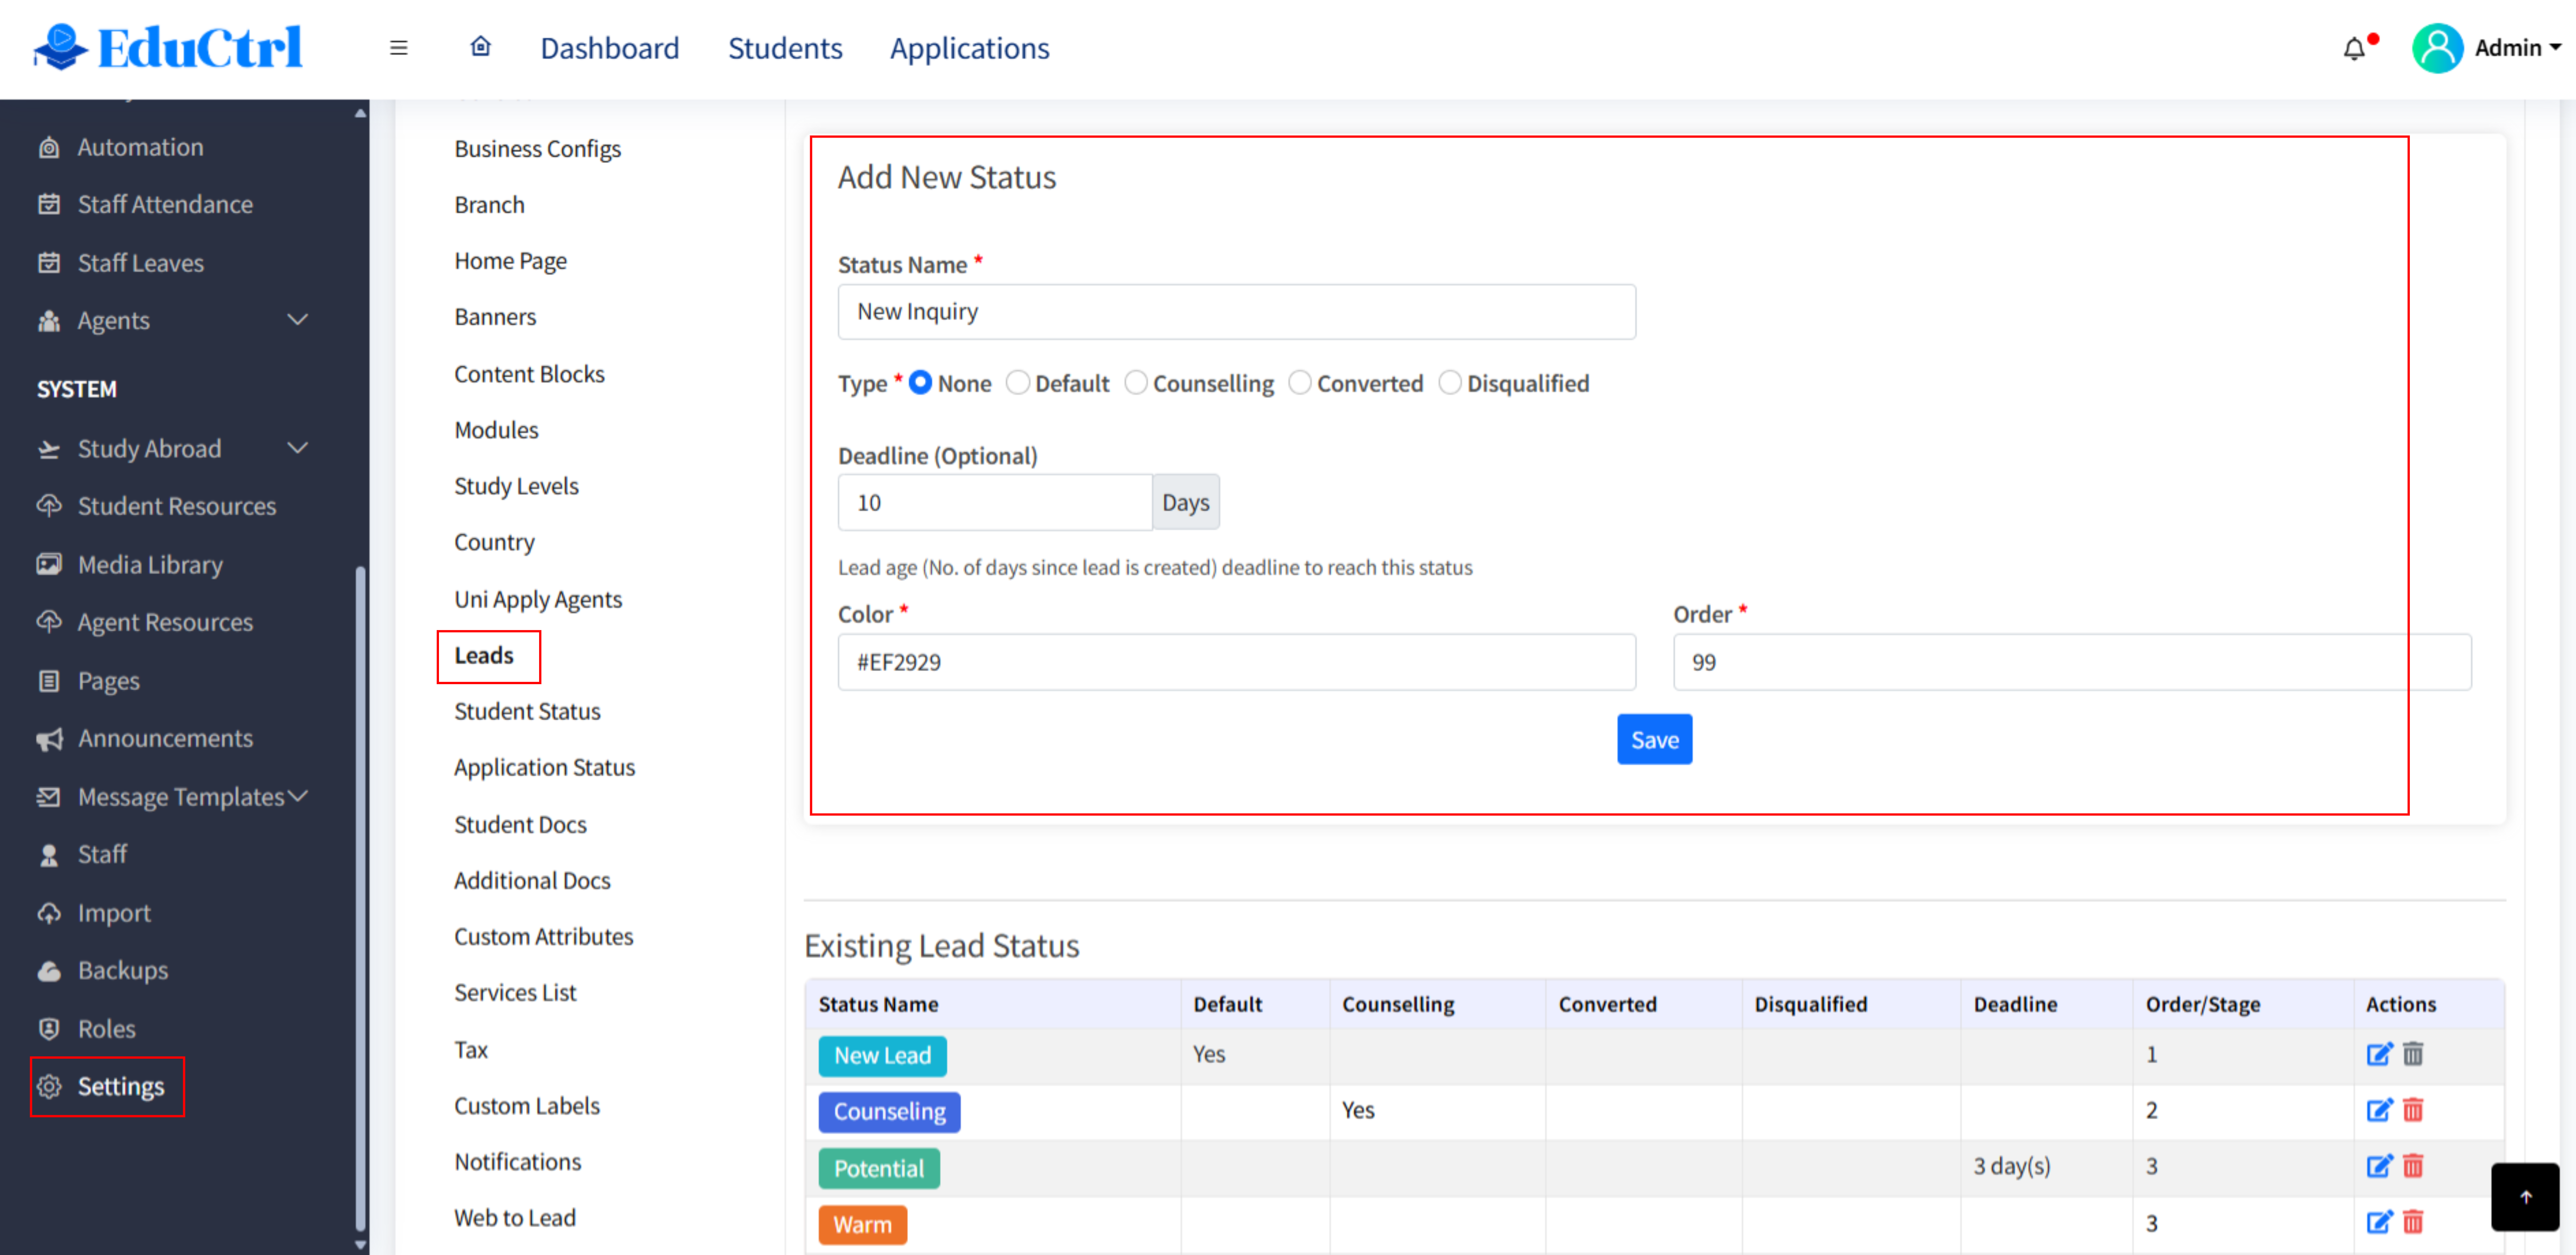
- Enter the following details:
- Status Name: e.g., "New Inquiry", "Counseling Scheduled"
- Status Type: Choose from:
- none
- Default
- Counseling
- Converted
- Disqualified
- Deadline (in days) (optional): Define how long a lead can stay in this stage before sending a reminder.
- Colour: Choose a label color to easily identify the status in lists.
- Order: Specify the order in which this status appears in dropdowns.
- Click Save.
Understanding Lead Status Types
- Default: Automatically assigned when a new lead is created.
- Counseling: Used when a lead is ready for a counseling session. Requires:
- Assigning a counselor
- Selecting a date & time
- Converted: When the lead becomes a student (interested in study abroad services).
- Disqualified: Used when a lead is not valid or uninterested.
Note: You must always have at least one lead status of each type: Default, Converted, and Disqualified. You can rename them to match your internal terminology.
Using Lead Stage Deadlines
Lead deadlines help automate follow-up reminders and ensure timely action by staff. Here's how it works:
- Set a Deadline (in days) for each lead stage.
- If a lead remains in a status beyond the deadline, a notification email is sent to:
- The assigned staff
- Their manager
- The super admin
Tags:
lead stages
lead pipeline
lead status
custom status
add status
counseling
counselling
converted
convert lead
disqualified
reject lead
← Back
