EduCtrl is a feature-rich cloud-based software to manage all aspects of Overseas Education Consultancy Business, Training/Coaching Institutions.
+91-924-213-7092
Give us a call
info@eductrl.com
Drop us email
Setting Access Restrictions by User Role
This article explains how to control what each staff member can access and perform in EduCtrl CRM based on their assigned role. Role-based access ensures team members only interact with relevant data and modules.
Prerequisites
- Admin access required
- Roles should be created or available under Settings > Role Management
- Staff users must already be created under System > Staff
A. Understanding Access Restrictions
In EduCtrl CRM, all access is governed by the permissions assigned to each role. Staff cannot view or perform actions outside the permissions defined for their role.
Examples of access restrictions:
- A Counsellor can view and manage only their assigned leads and students.
A Branch Manager may view all data in their branch but not edit system-wide settings.
B. Configuring Role Permissions
- Log in to EduCtrl CRM with admin credentials.
- Go to Settings > Role Management
- Click +Create Role or Edit an existing role
Enable or disable permissions for each module:
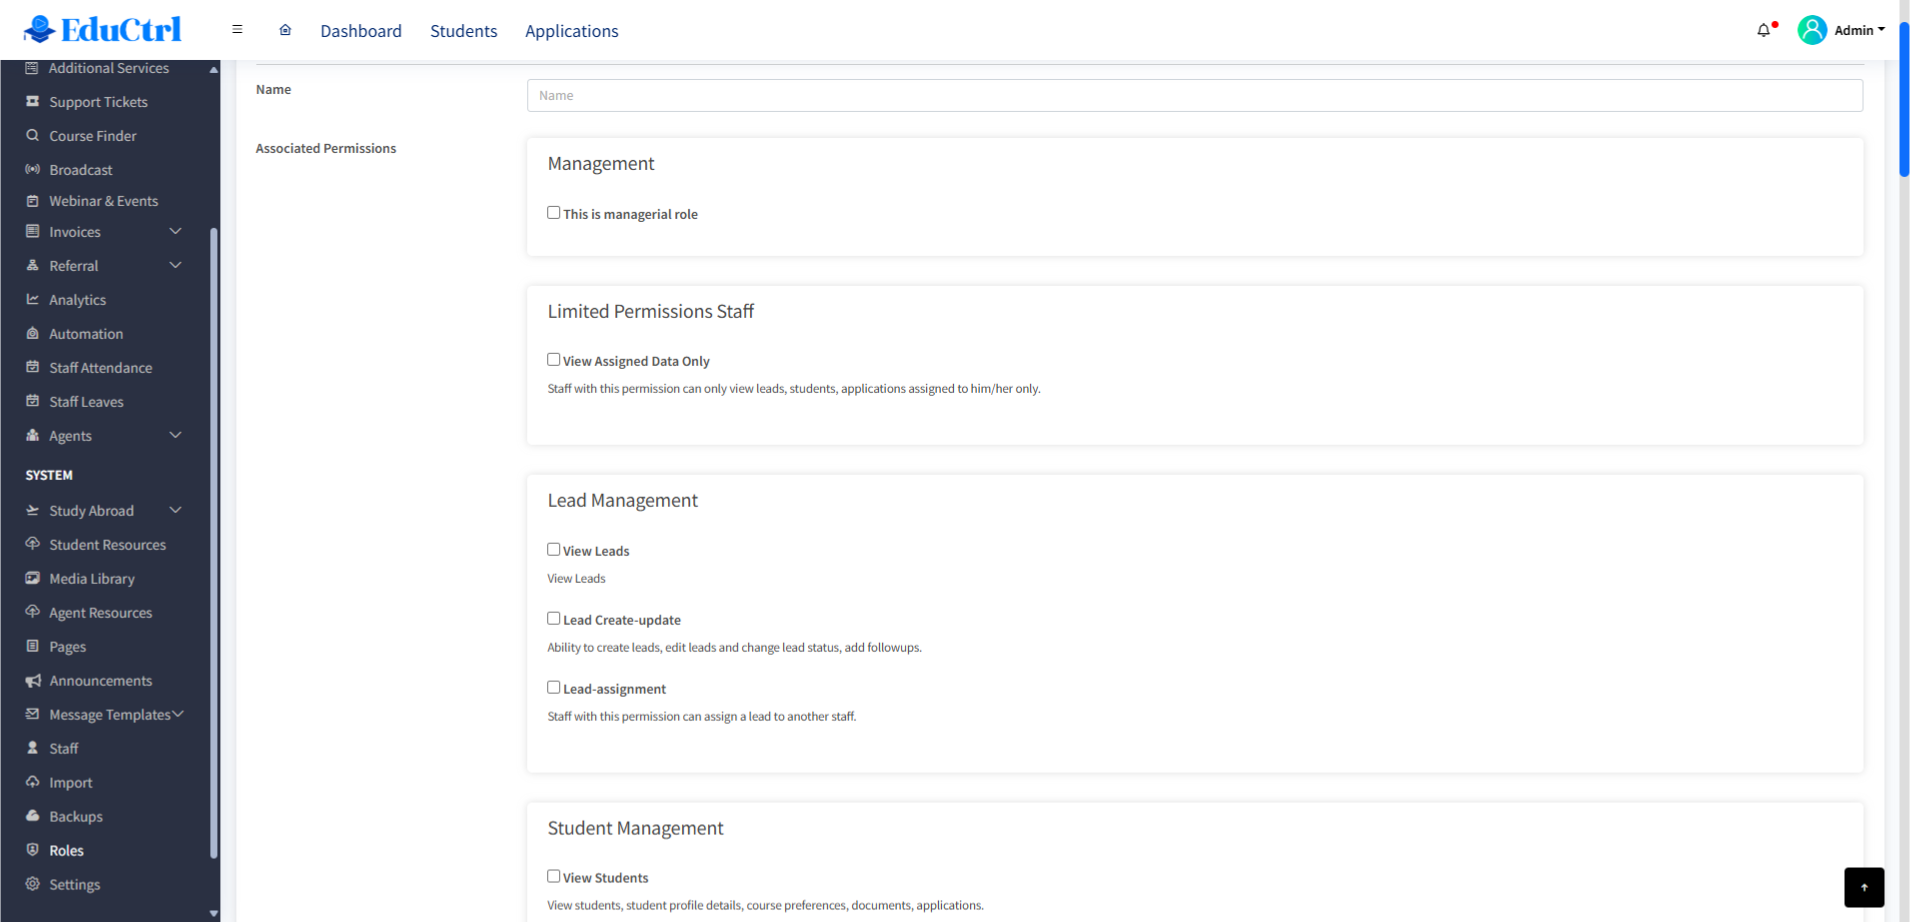
- Lead Management (View, Create, Edit, Assign, Delete)
- Student Management
- University Applications
- Invoices
- Agent Commissions
- Reports
- Email, SMS, WhatsApp Access
- Staff Management (Edit, View Attendance, Approve Leaves, etc.)
- Course Finder, Broadcast, Ticket Assignment
- Optionally enable View Assigned Data Only to restrict access to data specifically assigned to the user (leads, students, applications).
- Click Save to apply the permission set to the role.
C. Assigning Roles to Staff
- Go to System > Staff
- Click Edit on the staff member’s profile.
- In the Abilities section, select the appropriate Role.
- Ensure the staff is assigned to the correct Branch (as branch assignment limits data visibility).
- Click Update to save.
D. Example Use Cases
| Role | Access Restrictions |
|---|---|
| Counsellor | Can only see and manage leads/students assigned to them |
| Branch Manager | Full access to their branch, no system-wide permissions |
| Admin | Full CRM access, including system settings and role management |
| Front Desk | Limited to lead intake and viewing appointment schedules |
Best Practices
- Use descriptive role names (e.g., “Visa Officer,” “Branch Manager”) that reflect job responsibilities.
- Periodically review permissions to align with changes in team roles.
- Use Login as Staff to preview what a user with that role can see and do.
- Combine role-based permissions with branch assignments for maximum data control.
Troubleshooting / FAQs
Q: Why can't my staff see the Leads module?
A: Check if their role includes the “View Leads” permission and if they are assigned to the correct branch.
Q: Can I give partial access to a module?
A: Yes, each module has fine-grained controls like View, Create, Update, Delete, Assign, etc.
Q: Is there a limit to the number of roles I can create?
A: No. You can create as many custom roles as needed based on your team structure.
