EduCtrl is a feature-rich cloud-based software to manage all aspects of Overseas Education Consultancy Business, Training/Coaching Institutions.
+91-924-213-7092
Give us a call
info@eductrl.com
Drop us email
How to Configure Your CRM Settings
EduCtrl CRM offers a powerful and modular settings panel that allows administrators to configure branding, workflows, integrations, and automation. This article explains each configuration category available within the CRM settings.
Prerequisites
Admin access is required to view and modify settings.
Getting Started
To begin configuring EduCtrl CRM:
Login to your Admin Panel
Navigate to the Settings section under the System menu
Key Settings and Configuration Areas
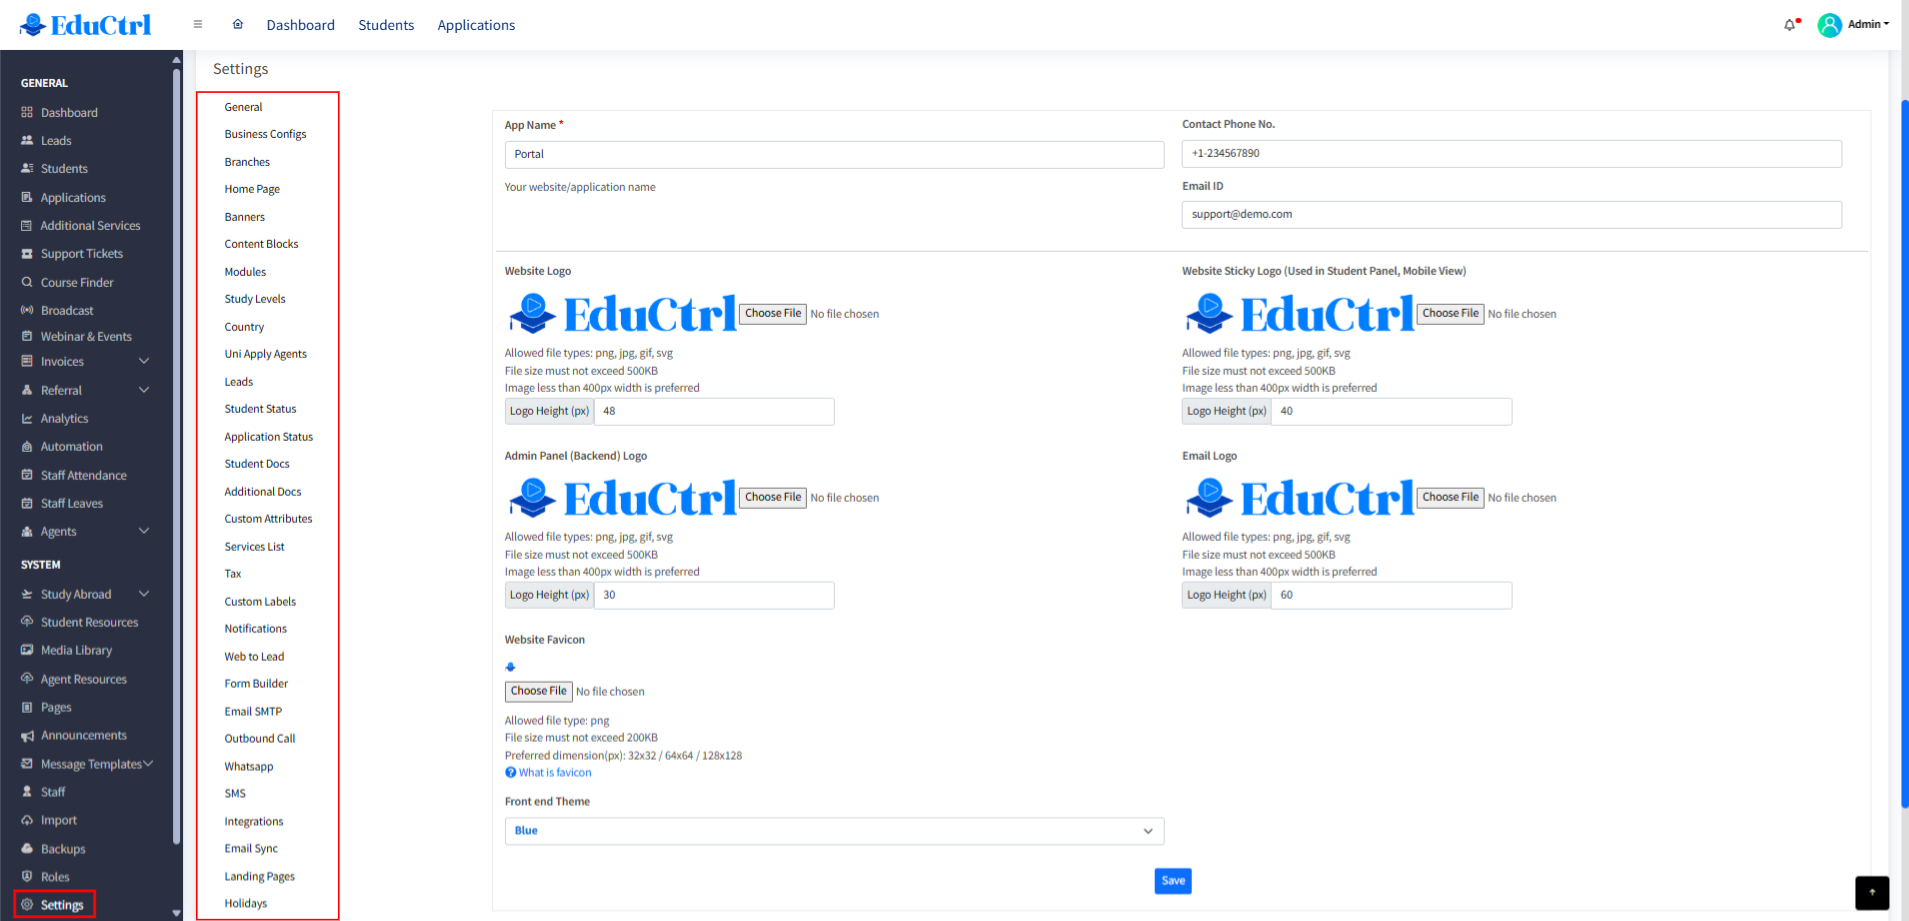
1. General Settings
Configure your CRM’s identity:
Application name
Portal, email, and admin panel logos
Contact email and phone
Favicon and color theme
Go to Settings > General
2. Business Configurations
Set up:
Business name, address, and tax ID
Bank details and invoice branding
Multi-entity configuration support
Go to Settings > Business Configs
3. Branch Management
Create and manage physical office branches. Assign users and leads to specific branches.
Go to Settings > Branches
4. Home Page
Control what appears on the portal’s front page:
Enable/Disable homepage slider, Staff Login, and Agent Login buttons
To edit homepage content, go to Pages > Type = Module Page - home > Edit
Modify content blocks (e.g., "Take your first step...") via Settings > Content Blocks
5. Modules
Enable or disable CRM modules as per your organization's needs:
Student panel features
Multi-language support
Payment gateways
Go to Settings > Modules
6. Banners
Upload and manage home page slider images.
Go to Settings > Banners
7. Content Blocks
Edit and manage dynamic sections below the main homepage content.
Go to Settings > Content Blocks
8. Lead Status
Define lead lifecycle stages:
Default statuses: Hot, Prospect, Counseling, Converted, Disqualified, Warm, Cold
Set lead deadlines to trigger alerts
Configure lead sources, disqualification reasons, and communication modes
Go to Settings > Lead Status
9. Student Documents
Customize document upload options by study level:
Set mandatory/optional for documents like SOP, Essay, etc.
Allow uploads for each course preference
Go to Settings > Student Docs
10. Additional Documents
Create custom document types for students:
Specify file types, destination-based visibility, and whether mandatory
Go to Settings > Additional Docs
11. Student Status
EduCtrl provides default statuses:
Pending, Course Preference Added, Documents Uploaded, Application Processing, Admission Complete, Rejected/Dropout
Rename or add new ones
Trigger automatic updates based on actions (e.g. course added)
Go to Settings > Student Status
12. Web to Lead Forms
Create public inquiry forms:
Auto-create leads from form submissions
Assign to staff/branch
Embed code or generate QR
Add custom fields saved under "Lead Notes"
Go to Settings > Web to Lead
13. University Application Status
Customize stages of university applications:
Set required notes, document upload, and whether status can be reverted
Define stage order for dropdowns
Go to Settings > Application Status
14. Additional Services
Manage services like:
Accommodation, Flight Tickets, Insurance
Define application flow and statuses for these services
Go to Settings > Services List
15. Uni Apply Agents
Configure aggregators associated with student applications and track invoices.
Go to Settings > Uni Apply Agents
16. Custom Attributes
Add custom profile fields for leads/students:
Field types: Text, Dropdown, Checkbox, Date, Year
Target: Lead, Student, or both
Set as mandatory or optional
Go to Settings > Custom Attributes
17. Form Builder
Create fully customizable lead capture forms:
Share via link or QR
Embed into websites and landing pages
Go to Settings > Form Builder
18. Notifications
Enable/disable:
In-App and Email alerts for leads, students, and applications
Notifications go to assigned staff, their manager, and super admin
Go to Settings > Notifications
19. Email SMTP Configuration
Configure outgoing email server:
Use your domain's SMTP
For Google Workspace, follow OAuth 2.0 integration
Go to Settings > Email SMTP
20. Outbound Email Sending
Assign "From Email"
For bulk sends, use Mailjet, Brevo, or SendinBlue
Use "Send Test Email" to validate
21. Study Levels
Manage student intent levels like:
Undergraduate, Postgraduate, PhD
Go to Settings > Study Levels
22. Country
Enable/disable destination countries you offer services for.
Go to Settings > Country
23. Tax Configuration
Create multiple tax rates:
Choose inclusive or exclusive
Region-based tax control
Go to Settings > Tax
24. Custom Labels
Rename internal terms to match your organization's vocabulary.
Go to Settings > Custom Labels
25. Communication Integration
Outbound Call: Integrate with Exotel or Zadarma
WhatsApp: Connect via Wait or AiSensy
SMS: Configure your provider’s gateway
26. Integrations
Google Lead Ads: Add Webhook key
Use Zapier or Pabbly for Facebook/Instagram form leads
27. Email Sync
Sync your inbox to auto-log leads or activities
All emails sent/received are tracked
Go to Settings > Email Sync
28. Holidays
Define organization-wide public holidays to reflect on calendars.
Go to Settings > Holidays
29. Advanced Settings
Explore additional system-level configurations.
Go to Settings > Advanced
Tips & Best Practices
Use modules and content blocks to control front-end experience.
Keep lead/application statuses aligned with actual workflows.
Use email and WhatsApp automation for timely communication.
