EduCtrl is a feature-rich cloud-based software to manage all aspects of Overseas Education Consultancy Business, Training/Coaching Institutions.
+91-924-213-7092
Give us a call
info@eductrl.com
Drop us email
Creating Invoice for University
Learn how to create and manage different types of university-related invoices in EduCtrl CRM, including Enrolled Student Invoices, Ad-hoc Invoices, and UniApply Agent Invoices.
Prerequisites
Admin access required
A Business must be created under Settings > Business Config
Tax configuration may be required under Settings > Tax
For agent invoices, the agent must be added under Settings > UniAgent Applications
Relevant university and application data should exist
Step-by-Step Instructions
Go to General > Invoices > University Invoices
Navigate to the General tab, select Invoices, then click University Invoices.Click Create
Click the Create button to view invoice options: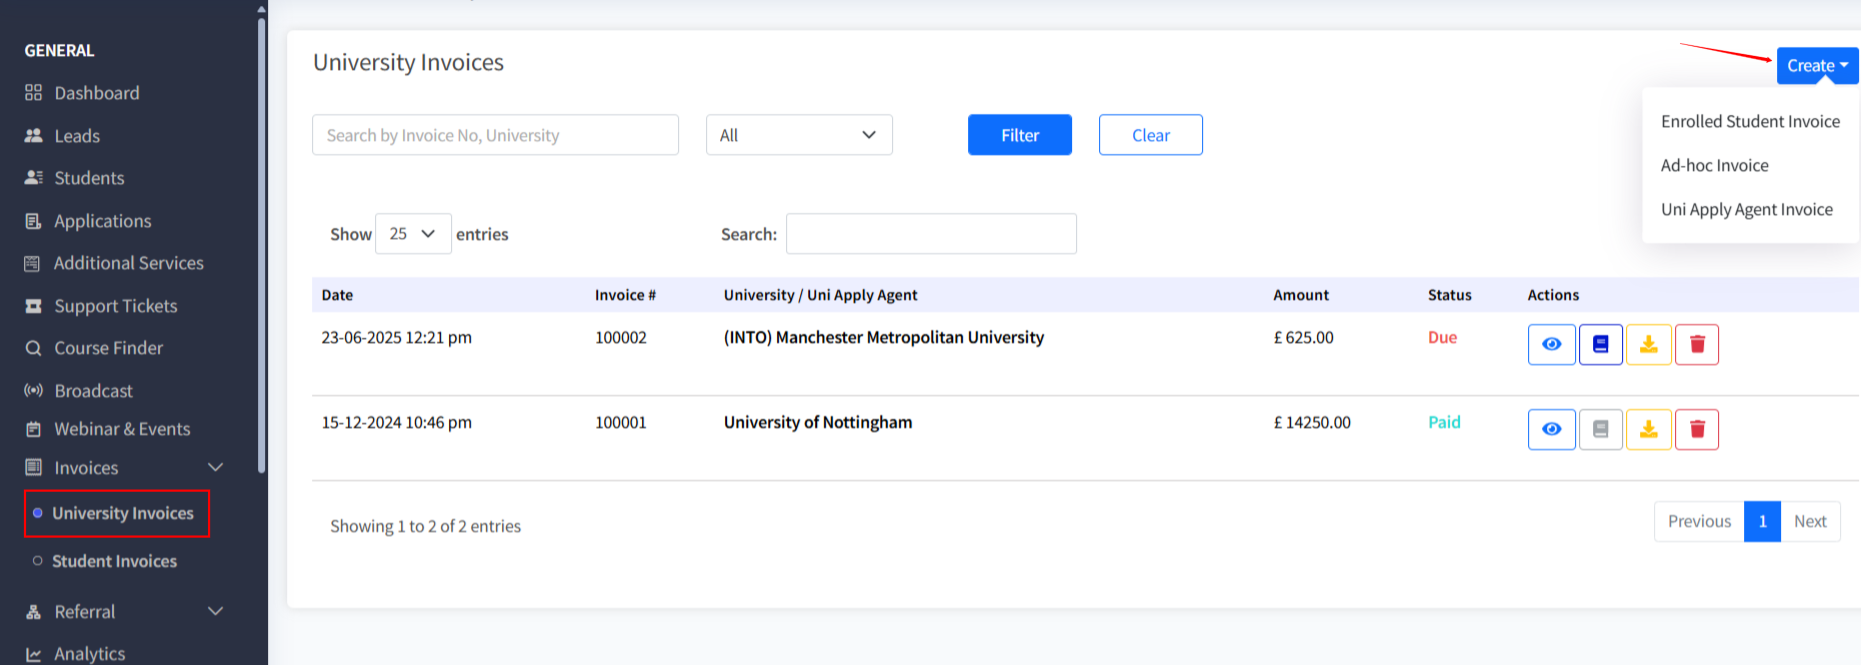
Enrolled Students Invoices
Ad-hoc Invoice
UniApply Agent Invoices
1. Enrolled Students Invoices
Select Enrolled Students Invoices
Choose the University, Intake, and Application Status
Click Submit to load applications
Use the checkboxes to select individual applications or click Select All at the top
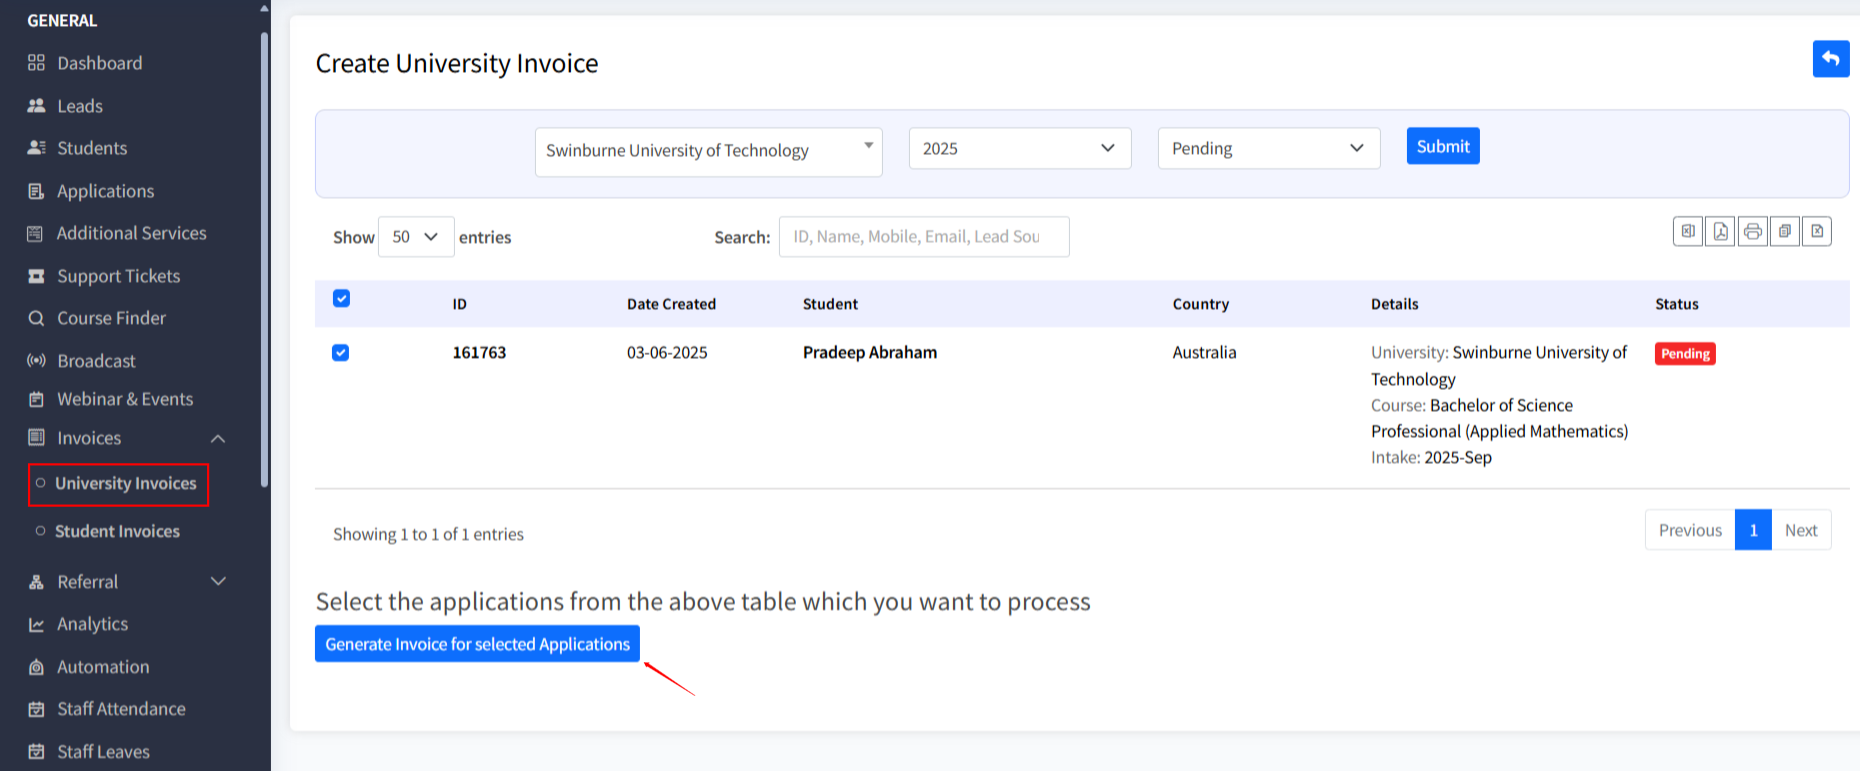
Click Generate Invoices for Selected Applications
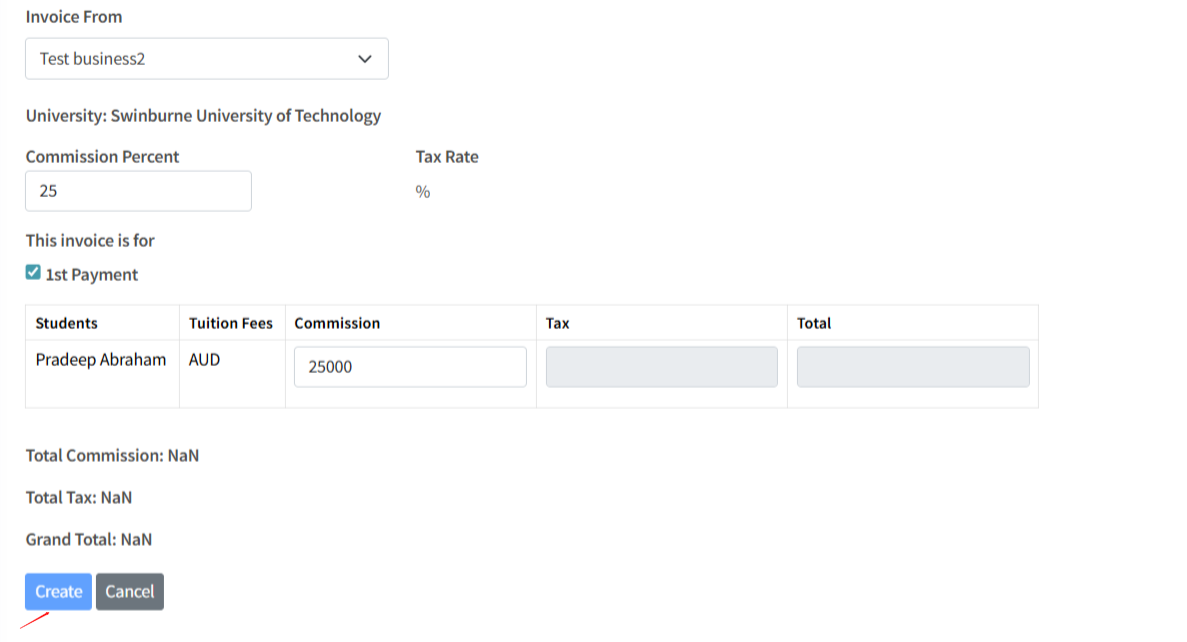
Ensure the Tuition Fees field is filled for each application
Click Create to generate the invoices
2. Ad-hoc Invoice
Click Ad-hoc Invoice
Fill out the form:
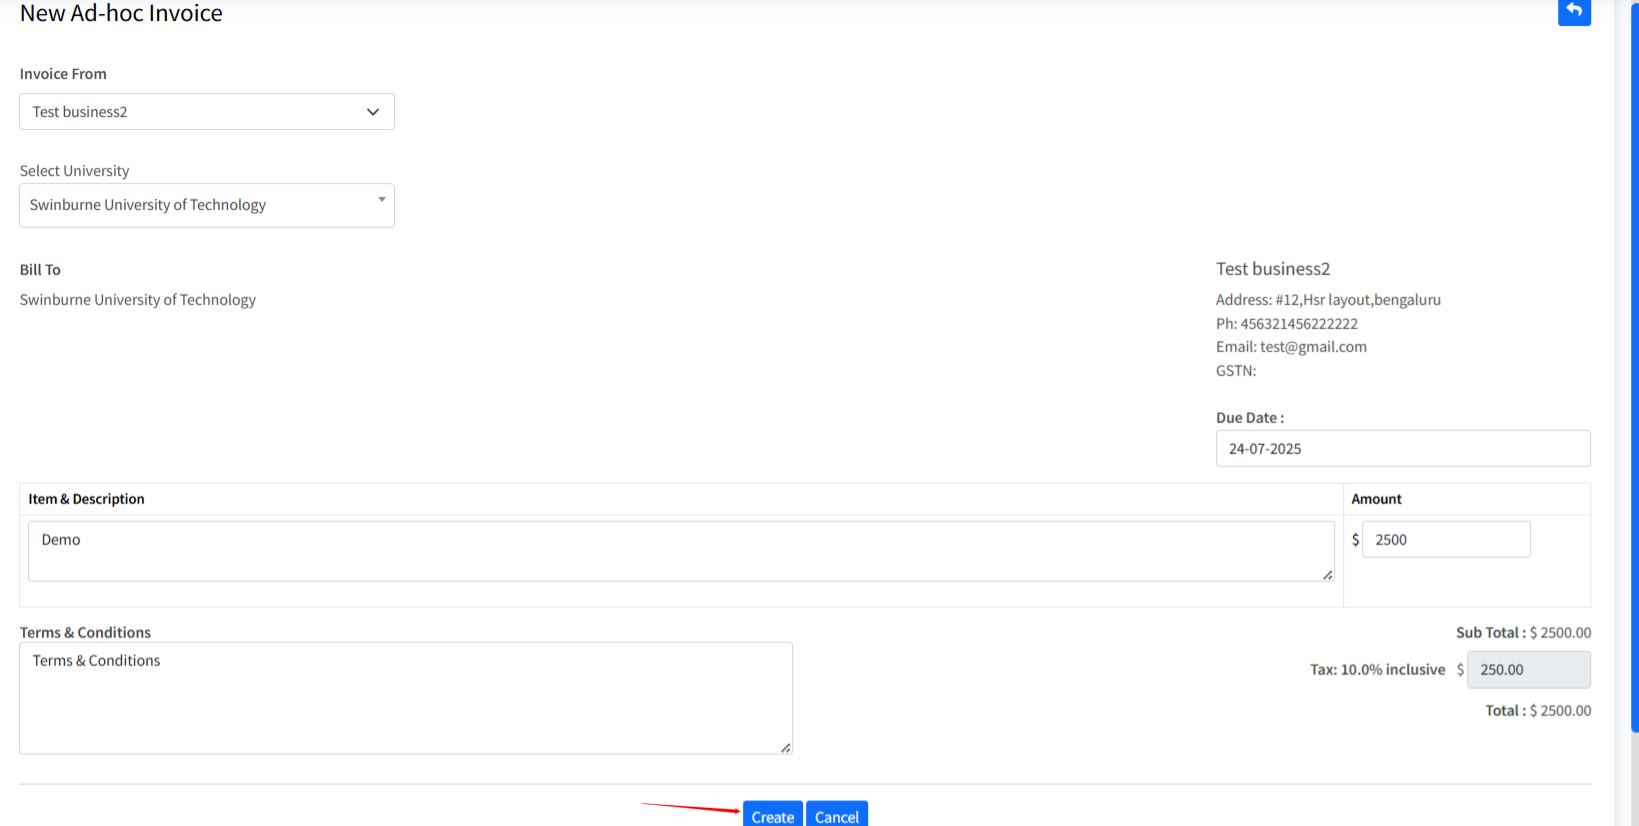
Invoice From: Select a Business
(If none exists, go to Settings > Business Config to create one)University: Select a university
If tax is not configured, a message will appear:
"Tax is not configured for the selected university!"
Click Configure to go directly to University details page
Due Date
Item & Description
Amount
Terms & Conditions (optional)
Click Create to finalize the Ad-hoc Invoice
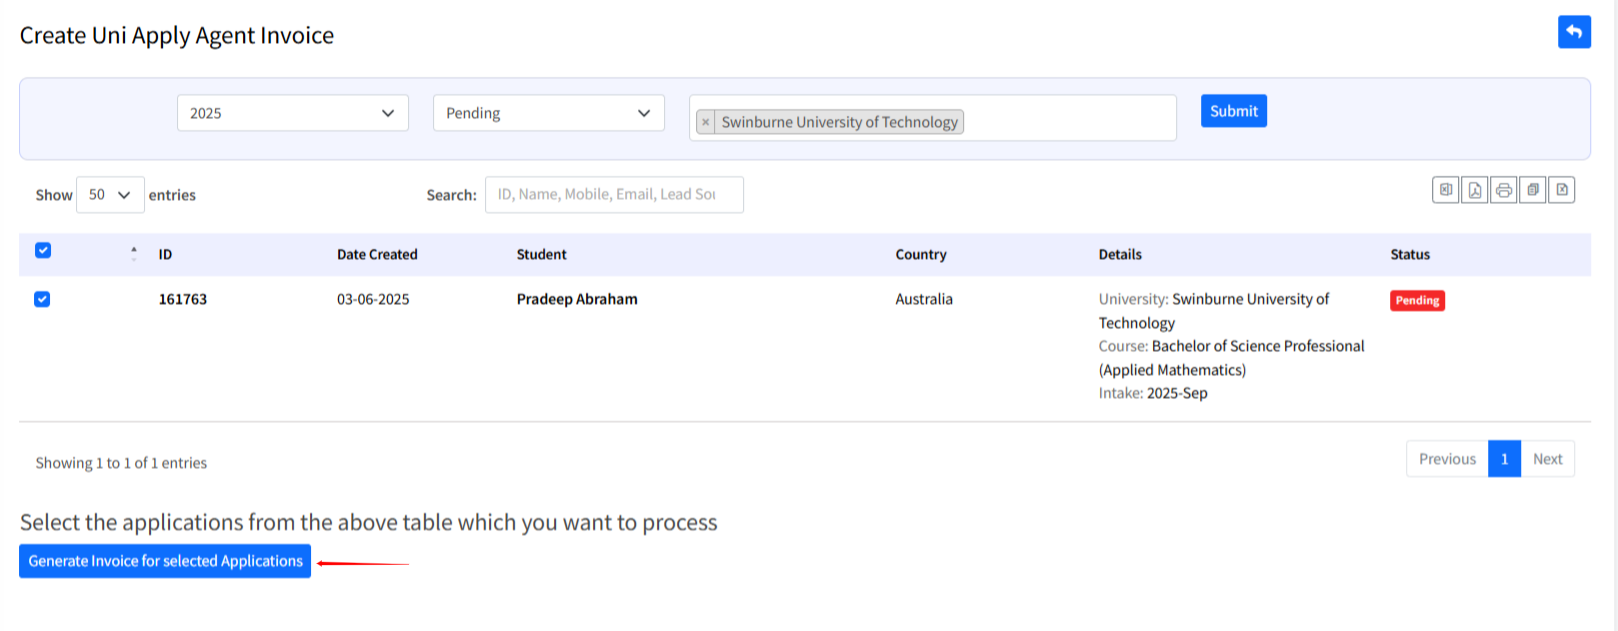
3. UniApply Agent Invoices
Click UniApply Agent Invoices
Select the Intake Year, Application Status, and University
Click Submit to fetch matching applications
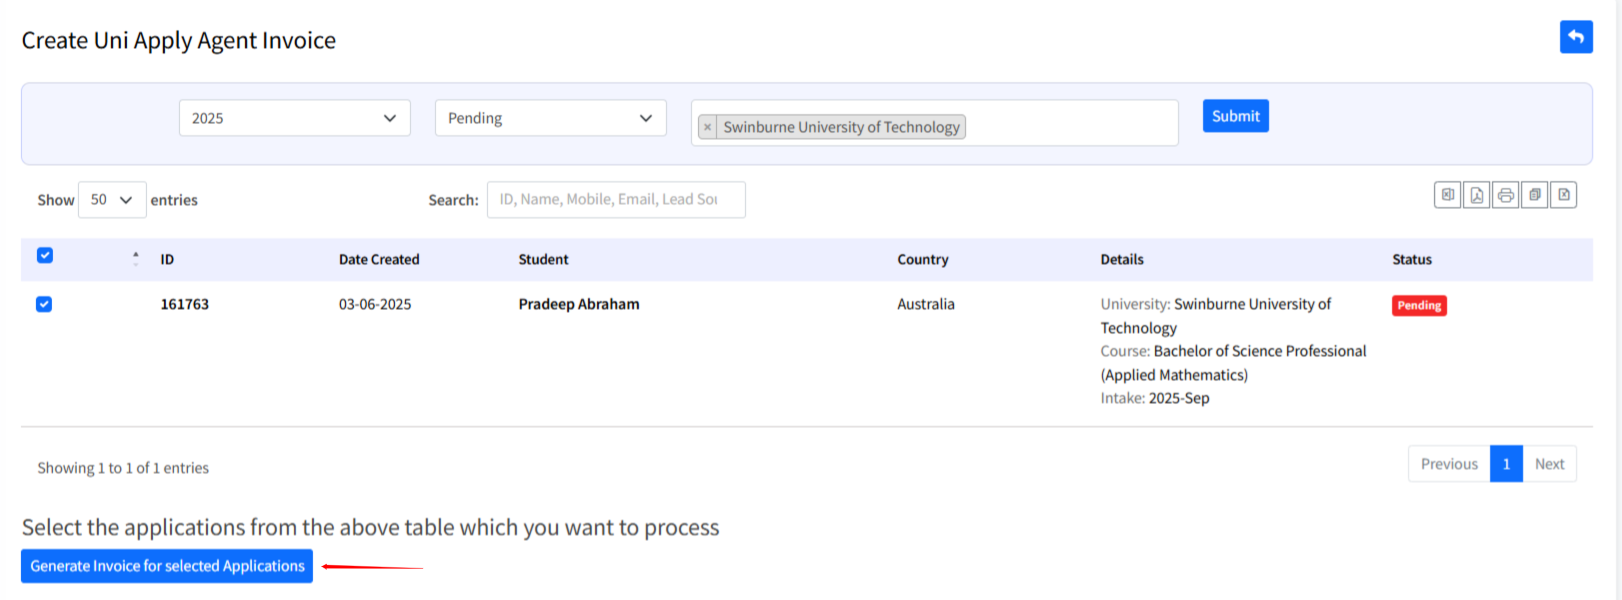
Use checkboxes to select records or click Select All
Click Generate Invoices for Selected Applications
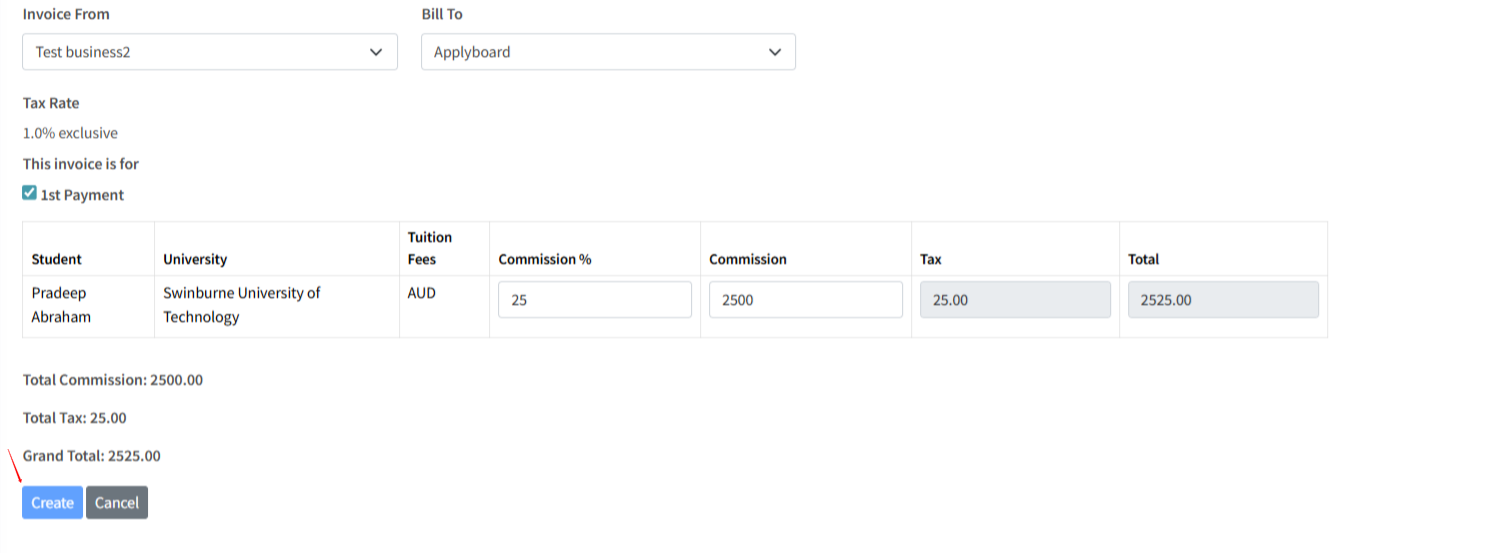
On the next page, fill in:
Invoice From: Select a Business
Bill To: Choose a UniApply Agent
Commission: Enter the applicable commission amount
Click Create to generate the invoice
Adding a UniApply Agent
To use UniApply Agent Invoices, you must add the agent first.
Go to Settings > UniAgent Applications
Fill in the agent details:
Name
Email
Phone Number
Address
GSTN
Tax Type
Tax Percentage
Commission count
Commission Details (if applicable)
Click Save
The agent will now appear in the Bill To dropdown while creating UniApply Agent Invoices.
Invoice Features
All created invoices will appear in the University Invoices list with the following:
Invoice Date
ID
University/UniApply Agent
Amount
Status
Available actions:
View, Download, or Delete
Email Invoice
Filter by status and By Searching like university ,Invoice Number etc
Tips & Best Practices
Always make sure Tuition Fees or Commission fields are not empty
Configure Business and Tax settings before creating invoices
Use Ad-hoc Invoices for one-off or custom charges
Apply filters to quickly find unpaid or overdue invoices
Use Automation to send payment reminders
Troubleshooting or FAQs
Q: I can't create an invoice. What should I check?
A: Ensure all required fields are filled and a business is selected. For agent invoices, make sure the agent is added first.
Q: I see a tax warning for Ad-hoc invoices.
A: Go to Settings > Tax and set up tax types and rules for the university.
Q: How do I email an invoice to a student or agent?
A: Open the invoice and use the Email Invoice option.
