EduCtrl is a feature-rich cloud-based software to manage all aspects of Overseas Education Consultancy Business, Training/Coaching Institutions.
+91-924-213-7092
Give us a call
info@eductrl.com
Drop us email
Creating Invoice for a student
Learn how to create and manage individual student invoices in EduCtrl CRM, including options to send by email, apply discounts, record payments, and view invoice history. You can create invoices from the main invoice section or directly from a student's profile.
Prerequisites
- Admin access required
- A Business must be configured under Settings > Business Config
- Student must exist in the system
Step-by-Step Instructions
Method 1: From the Invoices Section
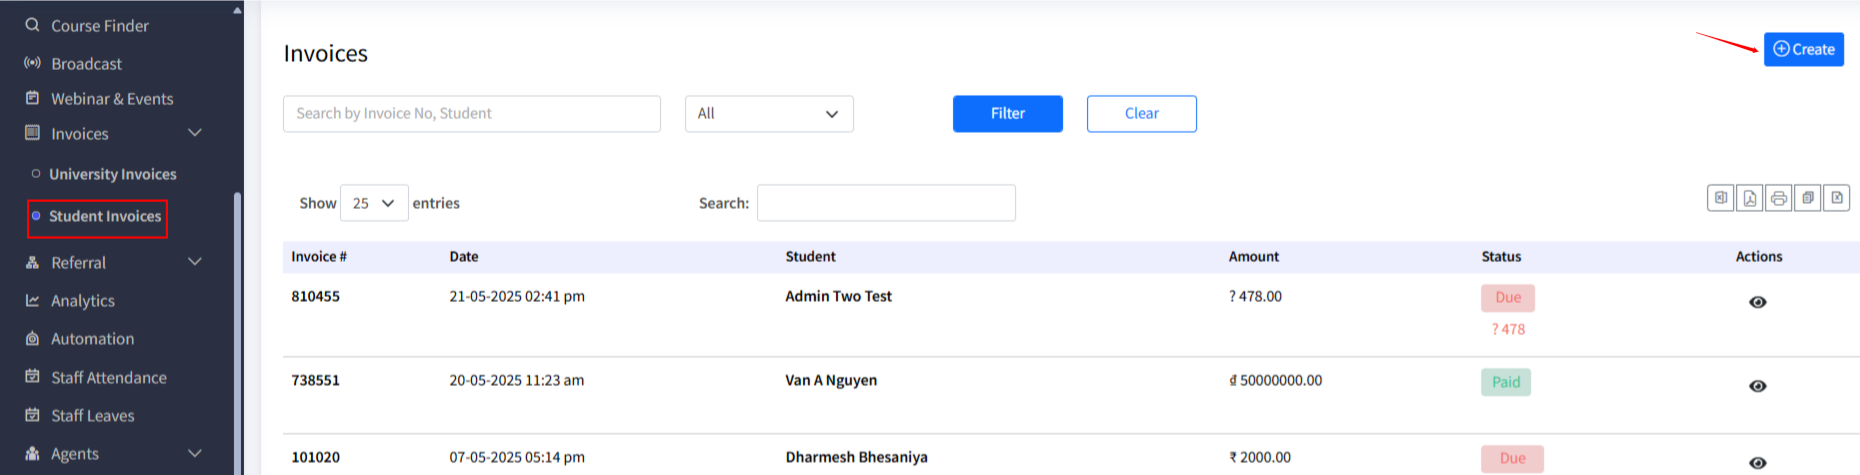
Go to General > Invoices > Student Invoice
From the left-hand menu, open the General module, select Invoices, then click on Student Invoice.- Select Business
Choose a business from the dropdown. - Select Student
Start typing the first three characters of the student's name. A dropdown will appear with matching records. Select the student. - Enter Due Date
Choose when the payment should be completed. - Add Item & Description
Add each service as a line item, including:- Item name
- Description
- Amount
- Add Terms & Conditions (optional)
Include payment instructions, refund policies, or other important terms. - Add Discount (optional)
Input any discount applicable. This will be subtracted from the total. - Email Invoice to Client (optional)
To send the invoice immediately via email, check the Email Invoice to Client box. Click Create
After filling out all required fields, click Create to generate the invoice.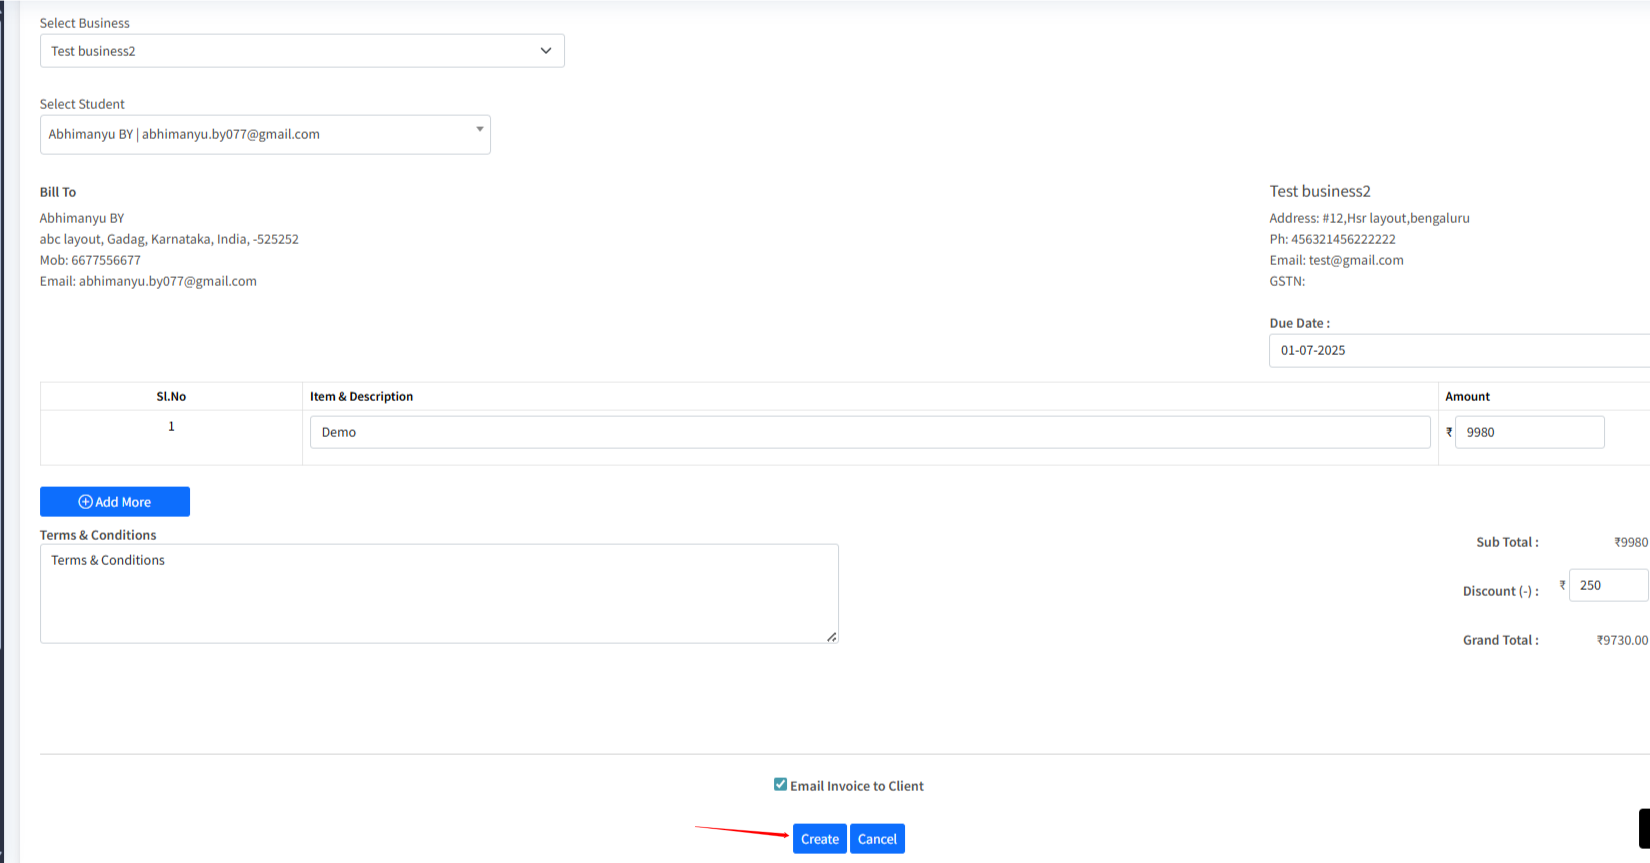
Method 2: From the Student Profile

Go to Student > View > Overview
Find the student whose invoice you want to create.- Click Create
On the Overview tab, click Create under the invoice section.
This will navigate you to the same Student Invoice creation form described above, with the student pre-selected.
Post-Creation Actions
After the invoice is created, you can:
- View the invoice details
- Download the invoice as a PDF
- Email Invoice (if not already sent)
- Record Payment (full or partial)
- Mark as Paid or Pending
Filtering and Searching Invoices
You can filter or search invoices by:
- Status (Paid, Pending)
- Student Name
- Invoice Number
Tips & Best Practices
- Use the student profile method for quick access to invoice creation
- Always verify amounts, due date, and student before creating
- Use consistent naming for services in the Item Description
- Email invoices directly to avoid follow-up delays
Troubleshooting or FAQs
Q: Why can’t I find the student when creating an invoice?
A: Make sure the student exists and you’re typing at least three characters of their name.
Q: Can I record a partial payment?
A: Yes, use the Record Payment option and enter the paid amount.
Q: What happens if I forget to email the invoice?
A: You can return to the invoice later and click Email Invoice.
