EduCtrl is a feature-rich cloud-based software to manage all aspects of Overseas Education Consultancy Business, Training/Coaching Institutions.
+91-924-213-7092
Give us a call
info@eductrl.com
Drop us email
Creating and Updating a Student Profile
This article guides you through creating new student profiles and updating existing ones within EduCtrl CRM. It covers managing student details, filtering and searching students, handling course preferences, uploading documents, and managing university applications to streamline student management.
A. Creating a Student Profile
- A lead can be converted to a student, or a student profile can be created directly by staff or agents.
- To create a new student profile:
- Log in to EduCtrl CRM with appropriate permissions.
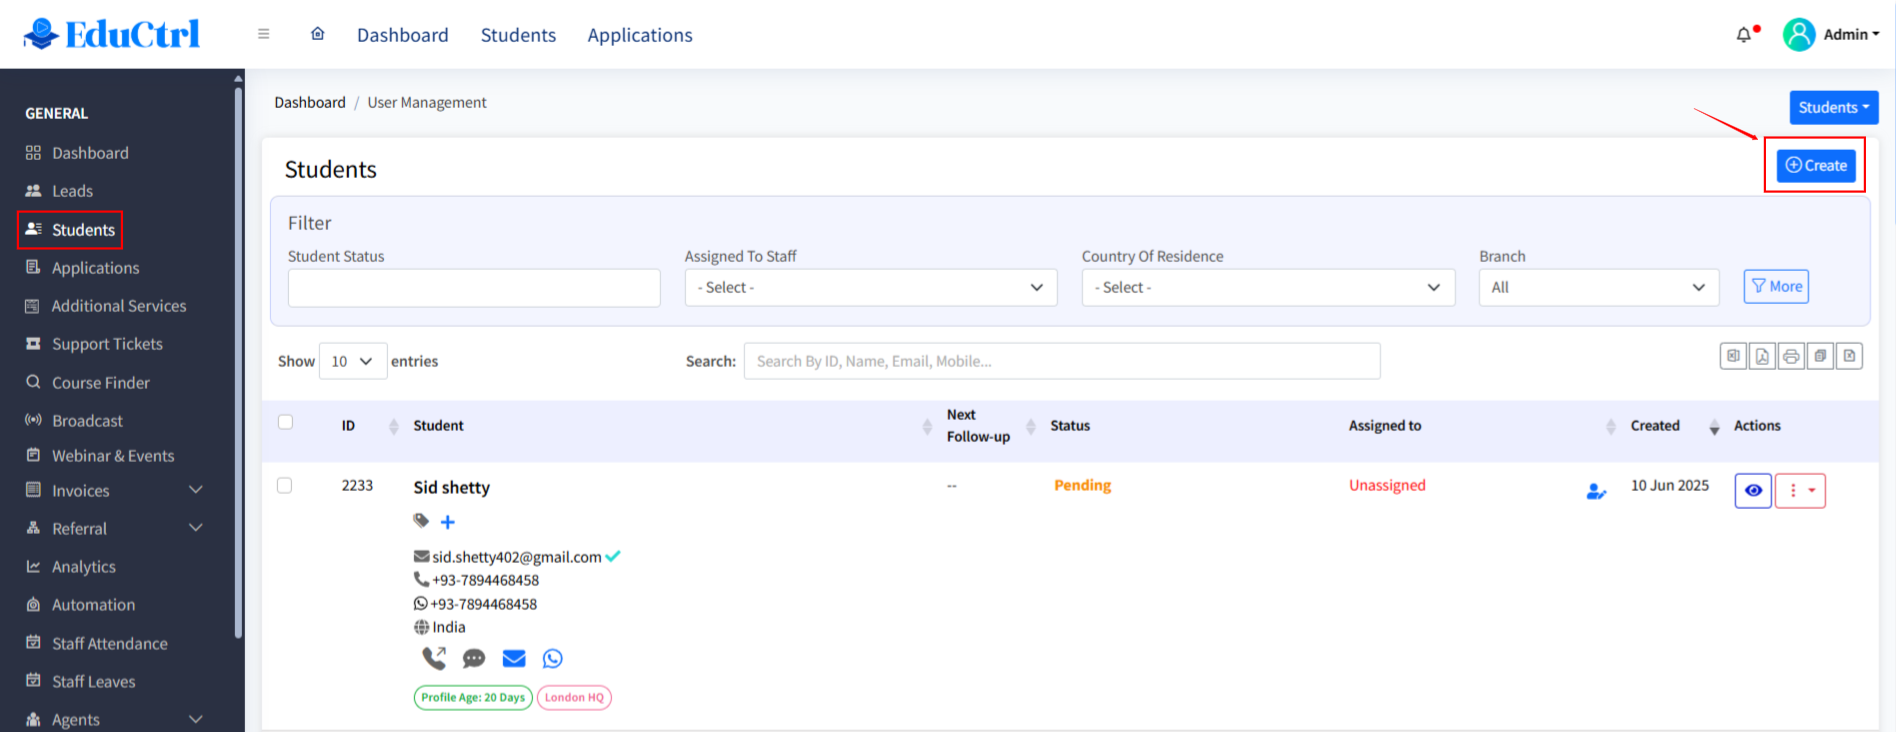
- Navigate to the Students section from the main menu.
Click +Create Student.
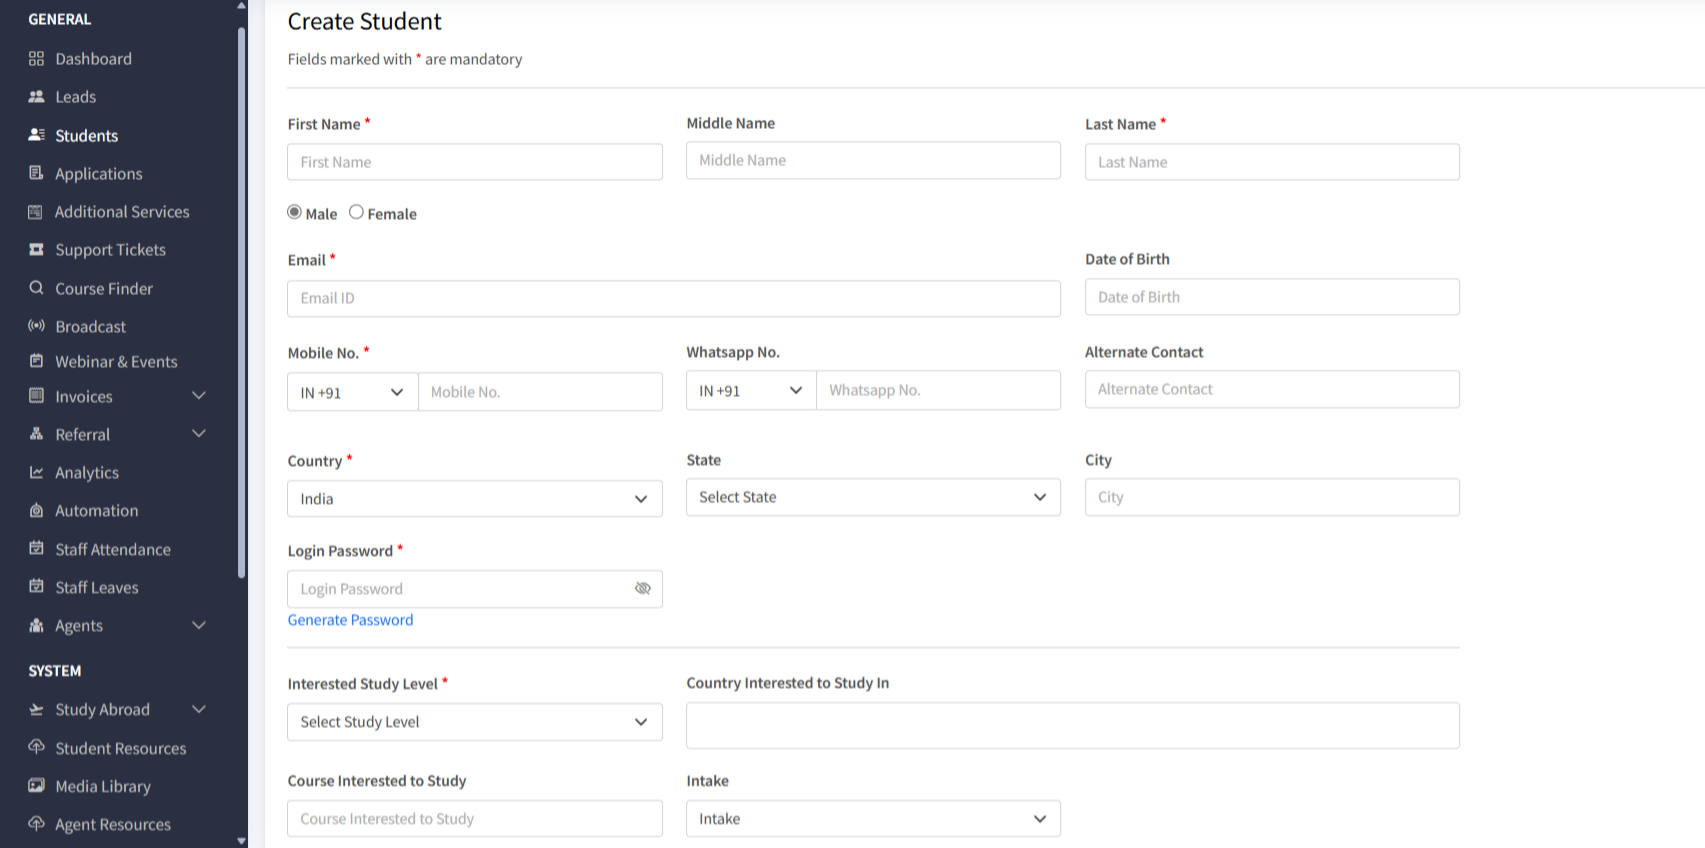
- Enter the student's personal details, contact information, and course preferences.
- Assign the student to the appropriate branch and staff member.
- Click Save to add the student profile to the system.
B. Managing Student Profiles
- The Students page lists all student profiles with options to filter by:
- Status (e.g., Pending, Course Preference Added, Documents Uploaded, Application Processing, Admission Complete, Rejected/Dropout)
- Assigned Staff
- Country of Residence
- Branch
- Use filters and search options to efficiently locate student records.
C. Filtering and Searching Students
- Use filters on the Students page to refine the list based on student status, course preferences, destination country, and more.
- Use the search box above the student list to find students by ID, name, or email quickly.
D. Updating Student Profiles
- Access a student’s profile by clicking on their name in the list.
- Click Edit Profile to update student information.
- Student profile sections include:
- Current and Permanent Address
- Passport Information
- Nationality and Background Information
- Emergency Contacts
- Academic Information
- English Test Scores
- Courses, Employment, Visa and International Travel History
- Family Details
- Save changes after updating the profile.
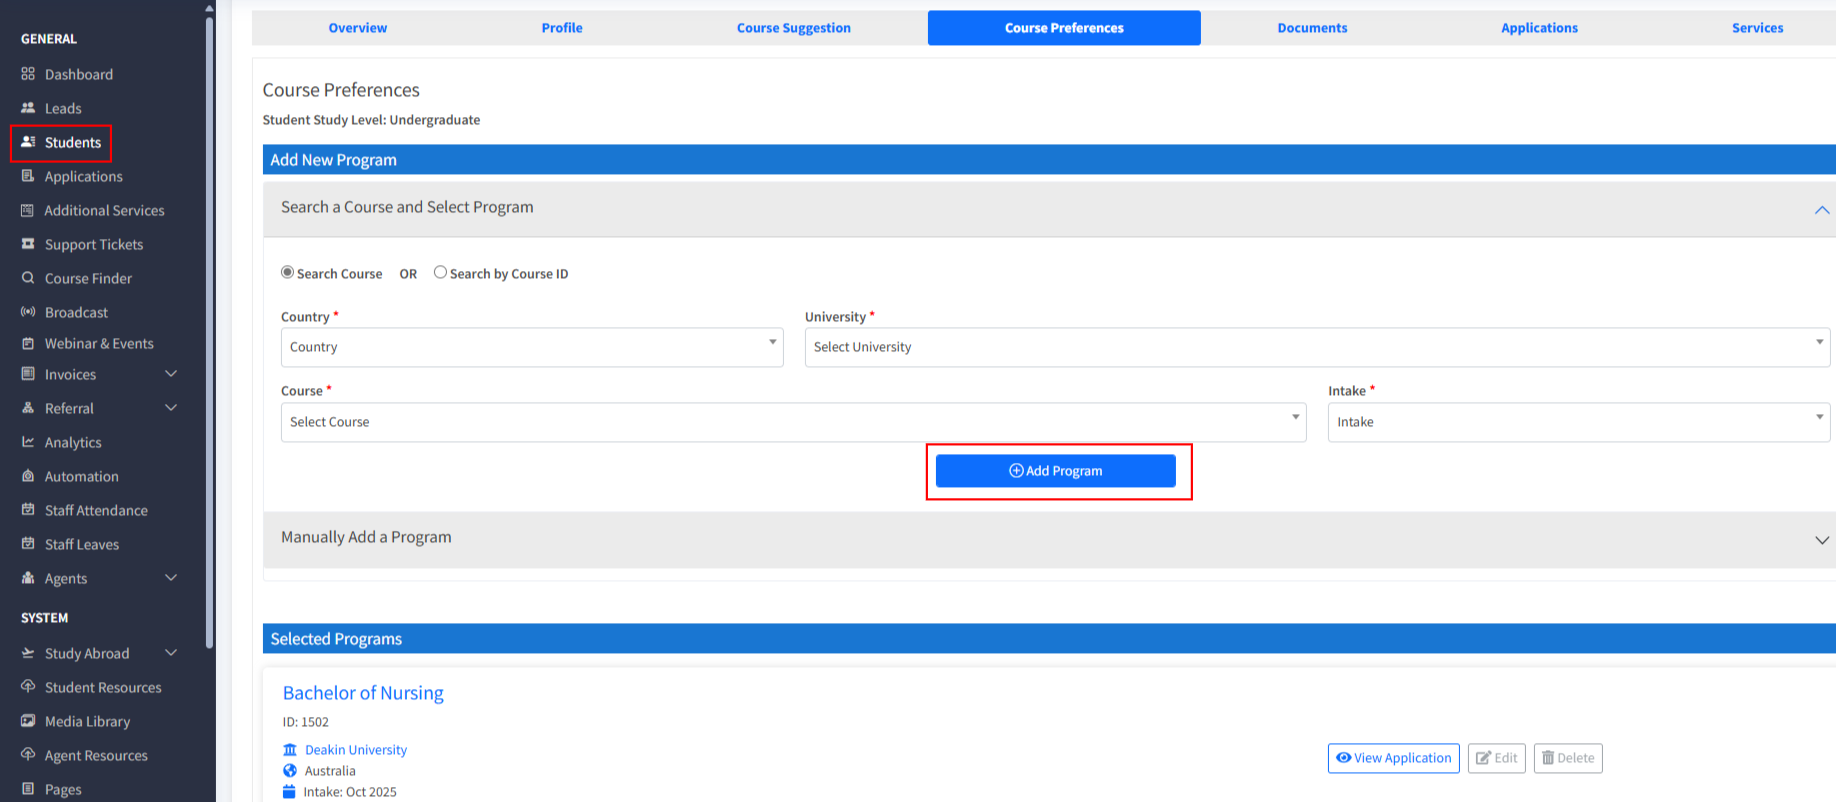
E. Managing Course Suggestions and Preferences
Share course suggestions with students using PDF documents or the Course Finder tool.
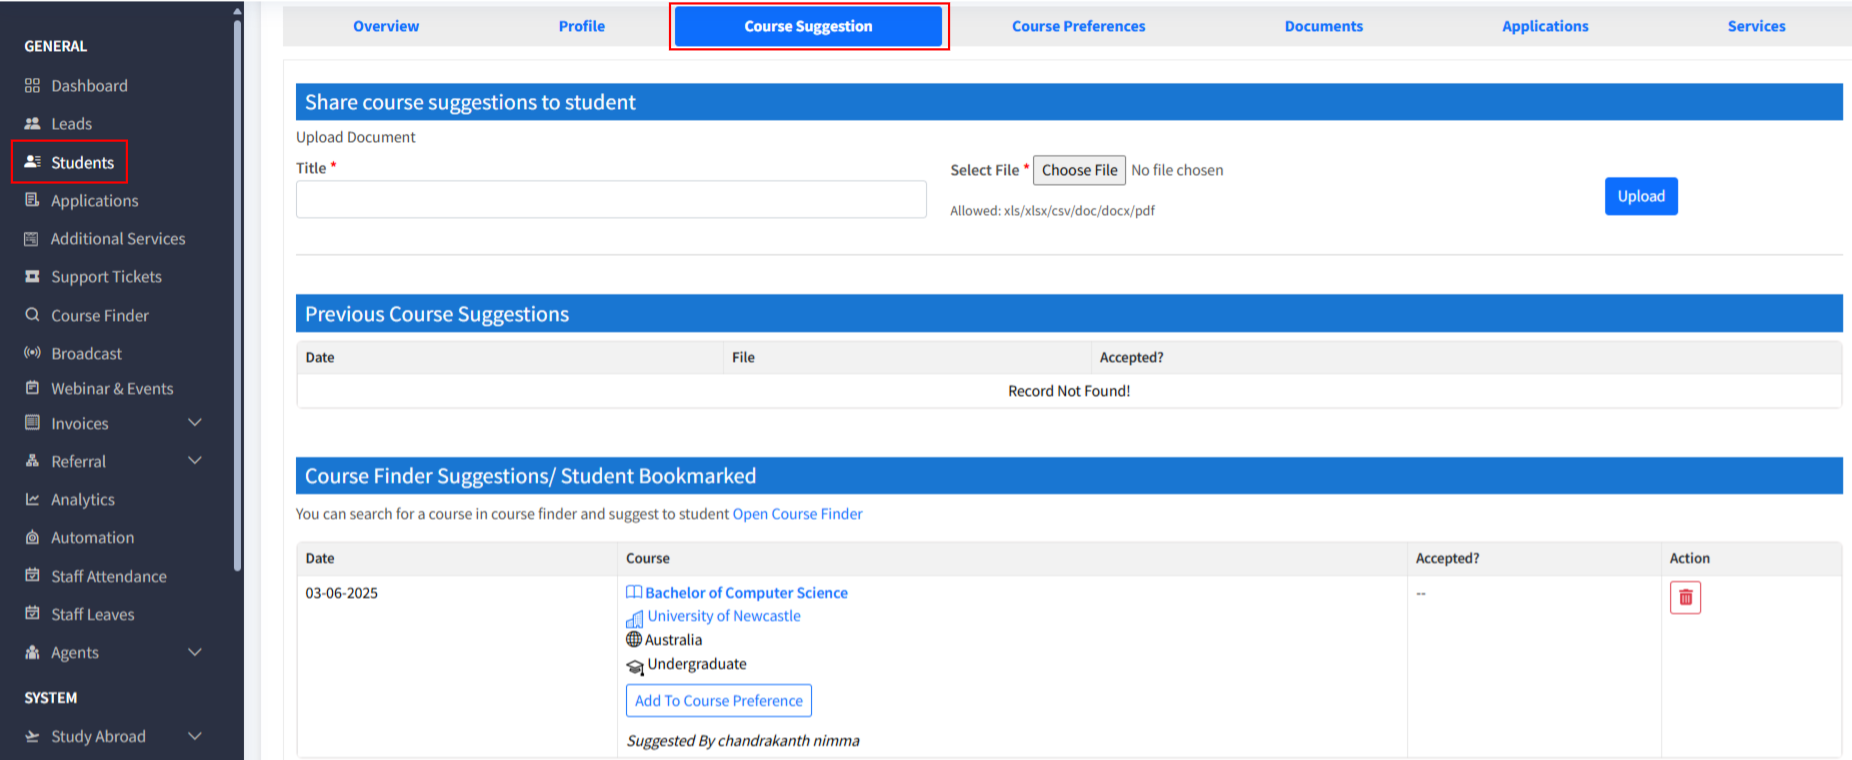
- Add new programs to a student’s course preferences by:
- Selecting from suggested courses
- Searching courses by destination country or university
- Manually adding courses if no data is available in Course Finder
Manage and update student course preferences as needed.
F. Uploading and Managing Documents & Certificates
- Upload essential documents such as academic certificates and passports in the Documents & Certificates section.
- View documents uploaded by the student.
Download individual documents or all documents as a ZIP file for convenience.
G. Managing University Applications
- The University Applications section displays application details including:
- Application ID
- Country
- University
- Course
- Year
- Intake
- Status
- To create a university application:
- Navigate to the student’s Course Preferences tab.
Click Create University Application for an existing course preference, or add a new course preference first and then create the application.
Best Practices
- Keep student profiles updated regularly to ensure accurate tracking and communication.
- Use filters and search frequently to manage large student lists efficiently.
- Encourage staff to upload all relevant documents promptly to maintain complete records.
- Utilize course suggestions and university applications features to assist students in their educational journeys.
