EduCtrl is a feature-rich cloud-based software to manage all aspects of Overseas Education Consultancy Business, Training/Coaching Institutions.
+91-924-213-7092
Give us a call
info@eductrl.com
Drop us email
Assigning Roles and Permissions to Staff
This article explains how to assign roles to staff users in EduCtrl CRM and configure the permissions attached to those roles. Roles determine what actions and modules a staff member can access in the CRM.
Prerequisites
- Admin access is required
- Staff must already be created under System > Staff
A. What Are Roles and Permissions?
Roles in EduCtrl define what a staff member is allowed to do. Each role has a set of permissions controlling access to different modules such as Leads, Students, Applications, Invoices, etc.
For example:
- A Counsellor may only view and manage assigned leads and students.
- A Manager may have full access to team performance, leads, applications, and reporting.
Permissions are fully customizable and assigned to a role, not directly to individual users.
B. Assigning a Role While Creating Staff
- Log in to EduCtrl CRM as an Administrator.
- Go to System > Staff
- Click +Create to open the staff creation form.
- In the Abilities section, select the desired Role (e.g., Administrator, Counsellor, Branch Manager, etc.)
- Complete other required fields such as First Name, Email, Branch, Reporting To, and Password
- Click Create to save the staff user with the selected role and its permissions.
C. Editing Roles for Existing Staff
- Go to System > Staff
- Click Edit next to the staff member you want to modify.
- Scroll to the Abilities section.
- Choose the appropriate role by selecting from the available list.
- Click Update to apply the changes.
D. Creating and Customizing Roles
You can create custom roles (e.g., Visa Officer, Front Desk Executive) with specific permissions.
To create a custom role:
- Go to Settings > Role Management
Click +Create Role
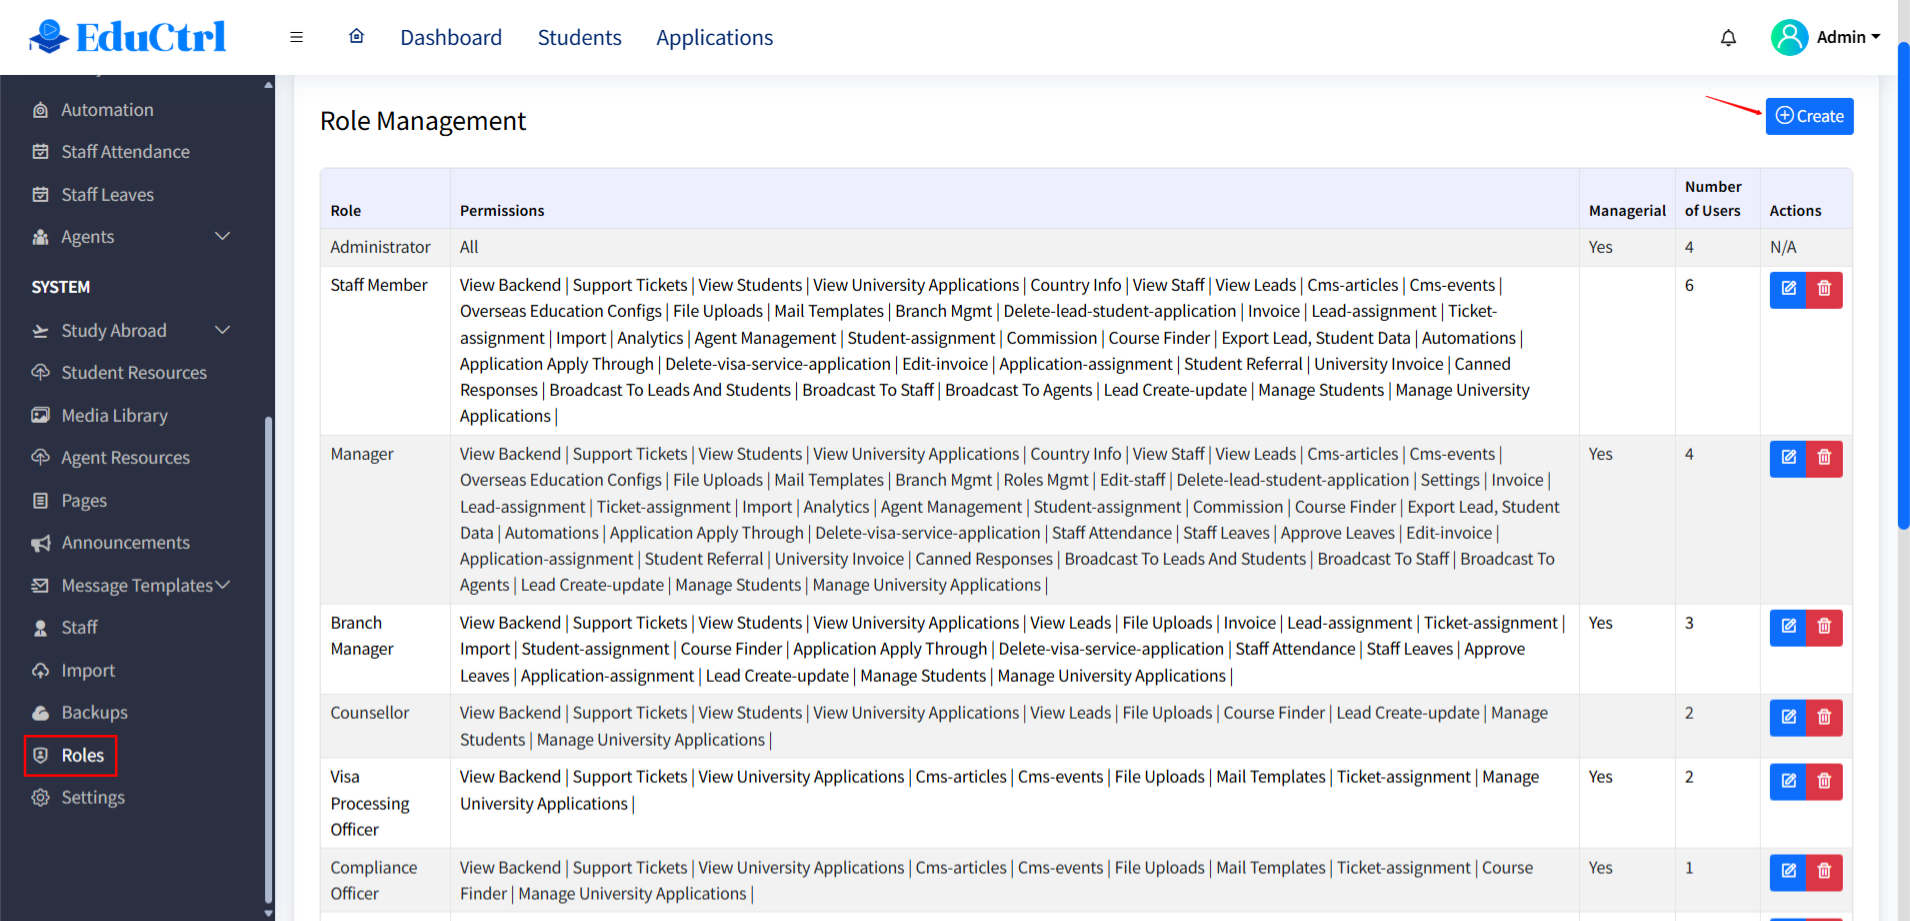
- Enter a Role Name (e.g., Admission Officer)
Check or uncheck permissions for each CRM module:
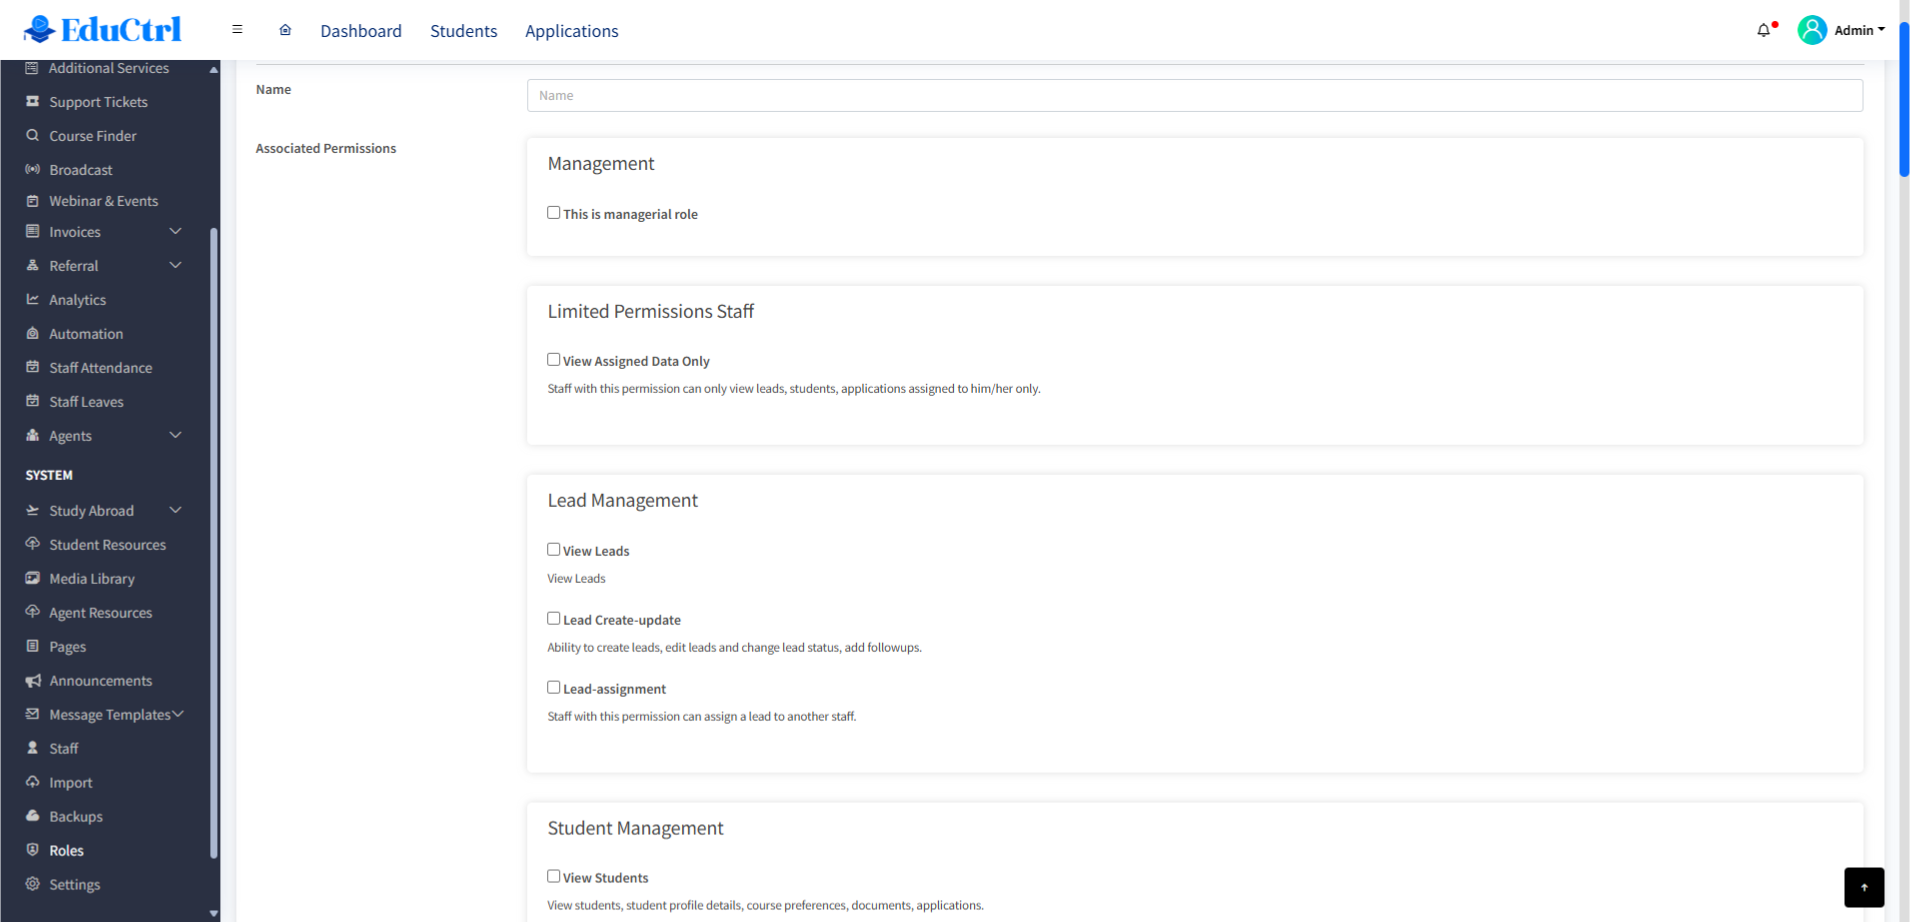
- Leads
- Students
- University Applications
- Agents and Commissions
- Emails, SMS, WhatsApp
- Invoices
- Staff Attendance
- Reports
- Broadcast
- Settings access
- And many more
- Click Save to create the new role.
Staff assigned this role will now inherit only the selected permissions.
E. Common Permission Categories
| Module | Example Permissions |
|---|---|
| Leads | View Lead, Lead create-update , Lead assignment |
| Students | View Students, Manage Students, Students-Assignment |
| Applications | View University Applications, Manage Applications, Application-Assignment, etc |
| Staff Management | View Staff , Edit Staff , Staff Attendance, Leave Approval |
| Agents | Agents Management, Commissions |
| Invoices Management | Invoice, Edit-Invoice, University invoice |
| Message Template Management | Mail Templates, Canned Responses |
| Advanced | Import, Role Management, Branch Management, Country info, Broadcast to leads and students, etc |
F. View Assigned Data Only Permission
You can limit access for staff to see only their assigned data (leads, students, applications, etc.)
To enable this:
- Go to Settings > Role Management
- Edit the role and enable View Assigned Data Only
- Save the role
Staff with this setting will only see the data they’re directly assigned to.
Best Practices
- Keep roles focused. Avoid giving unnecessary permissions.
- Use the Login as Staff feature to test what a role can access.
- Periodically review and update roles as your team structure evolves.
- For external or part-time staff, consider creating limited-access roles.
