EduCtrl is a feature-rich cloud-based software to manage all aspects of Overseas Education Consultancy Business, Training/Coaching Institutions.
+91-924-213-7092
Give us a call
info@eductrl.com
Drop us email
Adding Your First Student Lead
This guide explains how to manually create a new lead in EduCtrl CRM by entering personal, academic, and contact details, assigning staff, and scheduling follow-ups.
Prerequisites
Before you begin, ensure the following:
- You have admin access
- Your role has the following permissions enabled:
- View Leads
- Lead Create-Update
Go to Settings > Roles Management to verify or update your role permissions.
Step-by-Step Instructions
1. Log in to EduCtrl CRM
Visit your CRM login page and sign in using your staff or admin credentials.
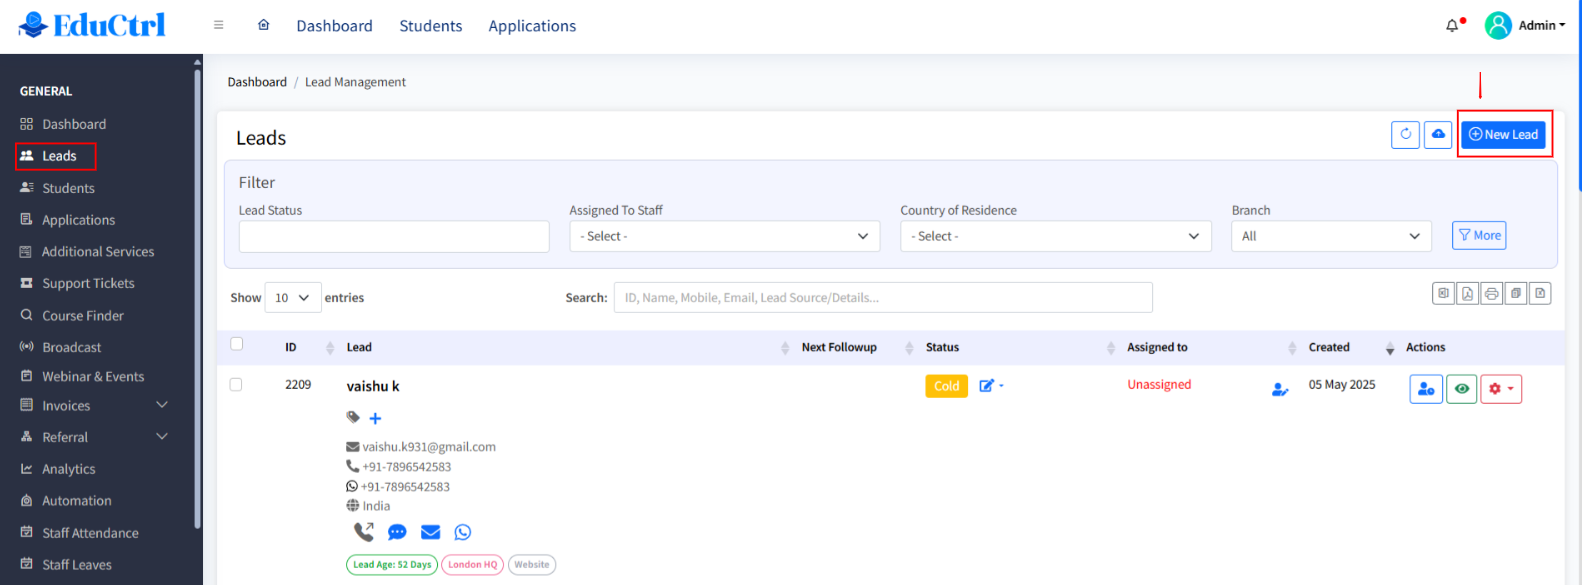
2. Open the Leads Module
From the left-hand menu, click on Leads.
3. Add a New Lead
In the top-right corner of the Leads page, click the Add New Lead button.
4. Fill Out Lead Information
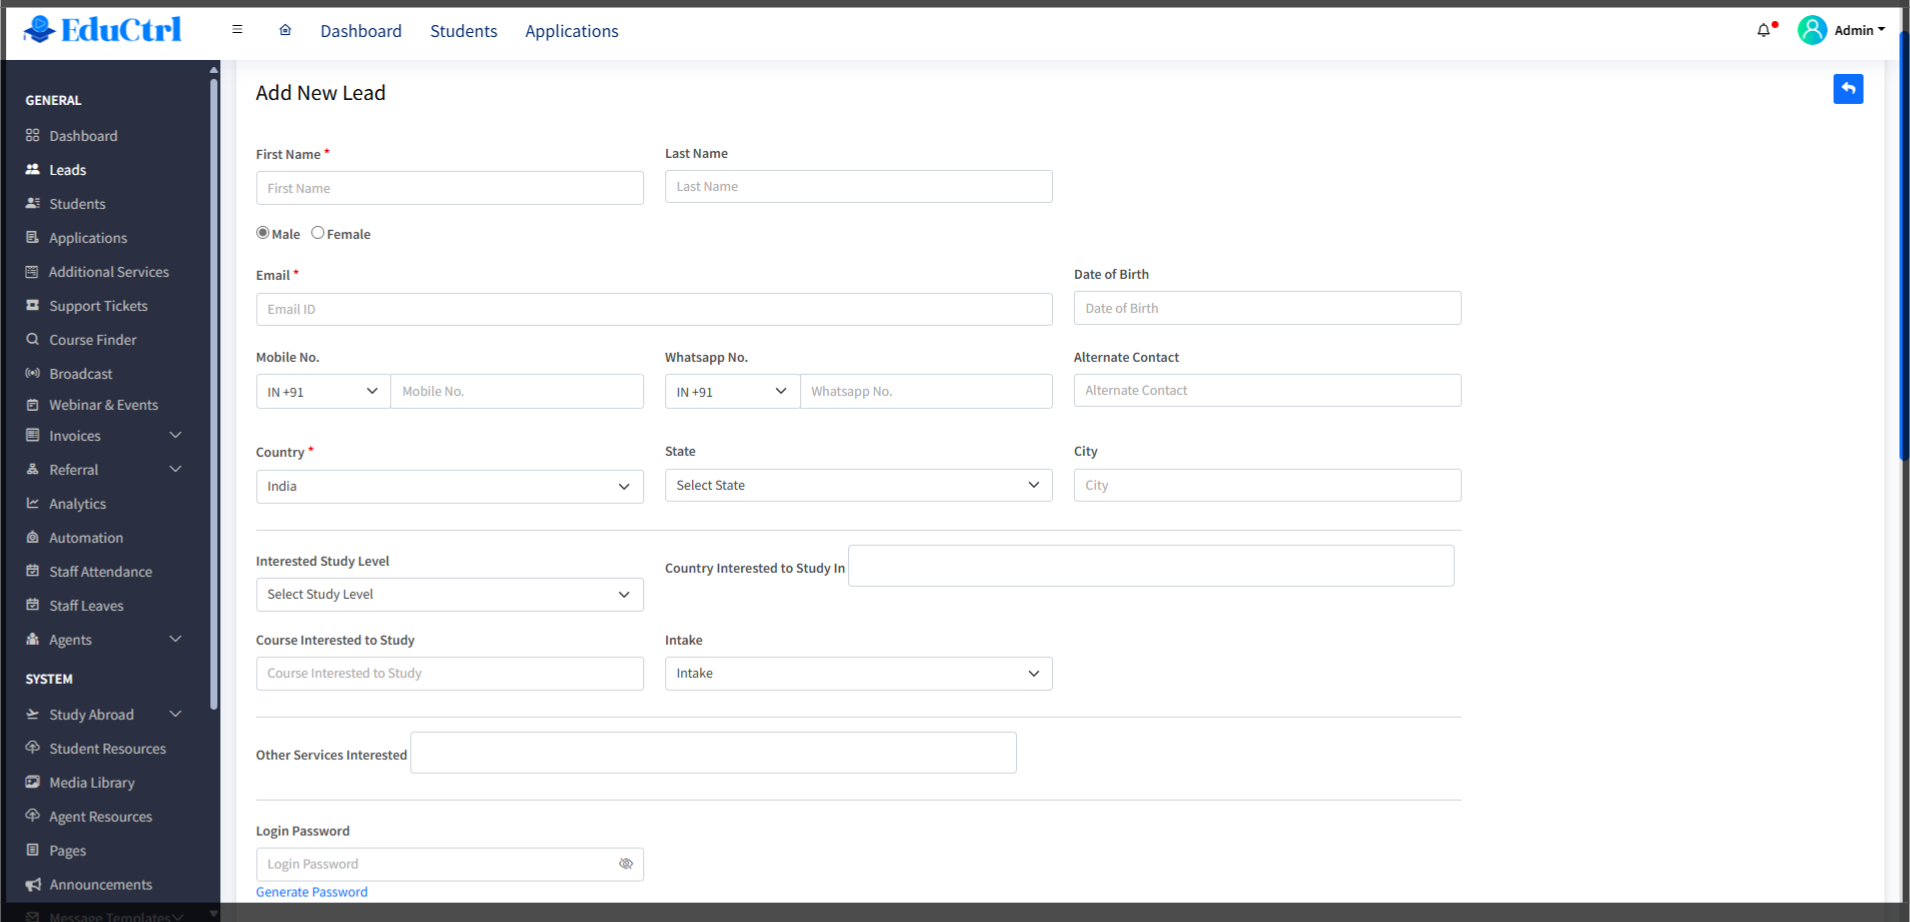
Basic Details
- First Name
- Last Name
- Gender
- Email Address and Mobile Number
Mandatory fields can be customized under: Settings > Advanced > Email, Mobile No. Mandatory Fields Configuration
Contact Information
- Date of Birth
- WhatsApp Number
- Alternative Number
- Country
- State and City
Education and Preferences
- Interested Study Level - customized under Settings > Study Level
- Country Interested to Study In
- Course Interested to Study
- Intake
- Other Services Interested -customized via Settings > Services List
Academic Background
- Qualification - customized in Settings > Advanced > Qualification Levels)
- Pass Out Year
- Score or Grade
- Currently Studying Course
- Work Experience
Language Proficiency
- IELTS, TOEFL, PTE, Duolingo scores
Custom Attributes
Custom fields can be added via Settings > Custom Attributes > Add New
Lead Source and Campaign
- Lead Source - customized via Settings > Leads > Lead Sources
- Lead Source Details
- Campaign Name
- Lead Notes
Referral and System Fields
- Referred by Student -type to search existing students
- Branch - managed via Settings > Branch
- Assign to Staff - managed under Staff Management
- Next Follow-up Date
5. Create the Lead
Once all required fields are filled out, click the Create Lead button.
6. Confirmation
You will be redirected to the lead detail page and see the message:
"Lead created successfully"
Tips and Best Practices
- Configure required fields in Settings > Advanced > Lead Creation Rules to ensure quality data entry.
- Use tags, study levels, and services to organize leads.
- Use the Import Leads button for bulk data entry to save time.
Troubleshooting and FAQs
Q: I can't see the "Add New Lead" button. What should I do?
A: Check if your role has the correct permissions under Settings > Roles Management.
Q: Can I import leads in bulk?
A: Yes. Use the Import Leads feature in the Leads module. Refer to the article: How to Import Leads via Excel.
