EduCtrl is a feature-rich cloud-based software to manage all aspects of Overseas Education Consultancy Business, Training/Coaching Institutions.
+91-924-213-7092
Give us a call
info@eductrl.com
Drop us email
Adding Custom Fields to Student Profiles
Learn how to extend student or lead profiles in EduCtrl CRM using custom fields (attributes), so your team can collect the exact data needed for your processes.
Prerequisites
- Admin access is required.
- Make sure you’ve identified the data type and target (Lead or Student) before creating fields.
Step-by-Step Instructions
- Navigate to Settings > Custom Attributes
Click on New
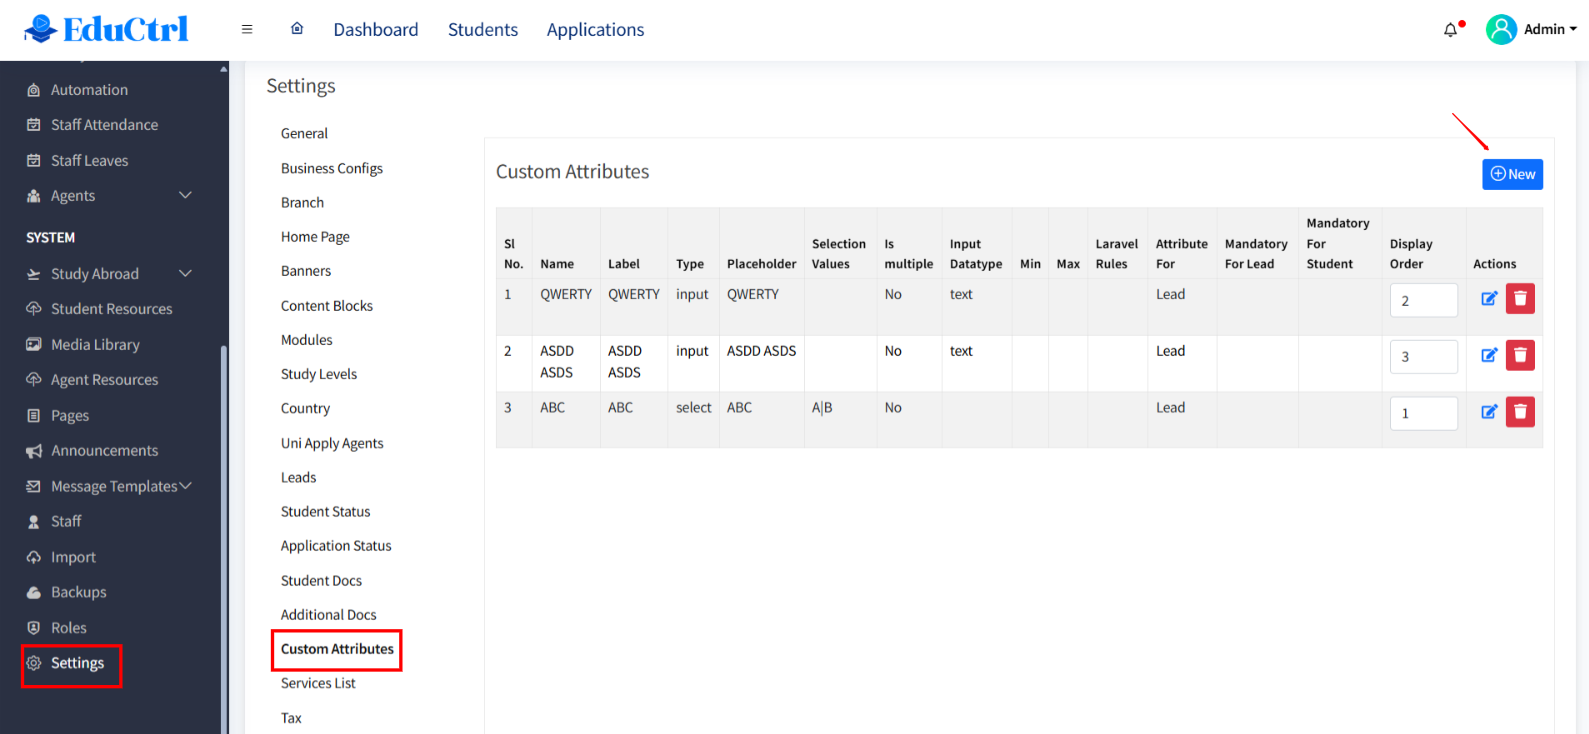
Fill in the required details:
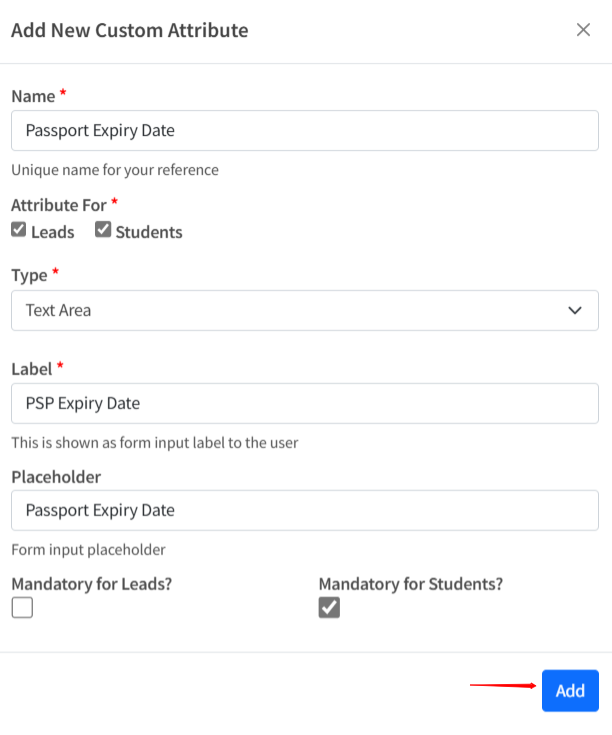
- Attribute Name: e.g., “Passport Expiry Date”, “Preferred Counselor”
- Target Profile:
- Choose Lead, Student, or Both
- Field Type: Select one of the following:
- select
- Input Field
- Text Area
- Checkbox
- Radio Options
- Label: Define how the field appears on the form
- Placeholder: Add a sample value or instruction inside the input box
- Mandatory: Make this attribute mandatory for Leads, Students, or both, as per your requirement
- Click Save
Once saved, the field will automatically appear in the lead or student profile under the appropriate section.
Use Cases for Custom Fields
- Collect additional visa or travel-related information
- Track internal references or counselor assignments
- Include preferences like country, accommodation, financial needs
Tips & Best Practices
- Keep attribute names clear and concise
- Use dropdowns or radio buttons for consistent data input
- Only make fields mandatory if absolutely necessary — too many required fields can slow down the process
Troubleshooting / FAQs
Q: I created a field but don’t see it on the profile page
A: Ensure you selected the correct target profile (Lead or Student). The field will only appear where it’s applicable.
Q: Can I delete a custom field later?
A: Yes, but be cautious. Deleting an attribute will remove all data entered for that field across all profiles.
