EduCtrl is a feature-rich cloud-based software to manage all aspects of Overseas Education Consultancy Business, Training/Coaching Institutions.
+91-924-213-7092
Give us a call
info@eductrl.com
Drop us email
Adding and Managing Staff Accounts
This article explains how to add new staff members in EduCtrl CRM, assign them roles, manage their access to different CRM modules, and control their actions through the Role Management system.
Prerequisites
- Admin access is required
- Staff roles and branches should be created under System > Role Management and Settings > Branches
A. Adding a New Staff Account
- Log in to EduCtrl CRM with your admin credentials.
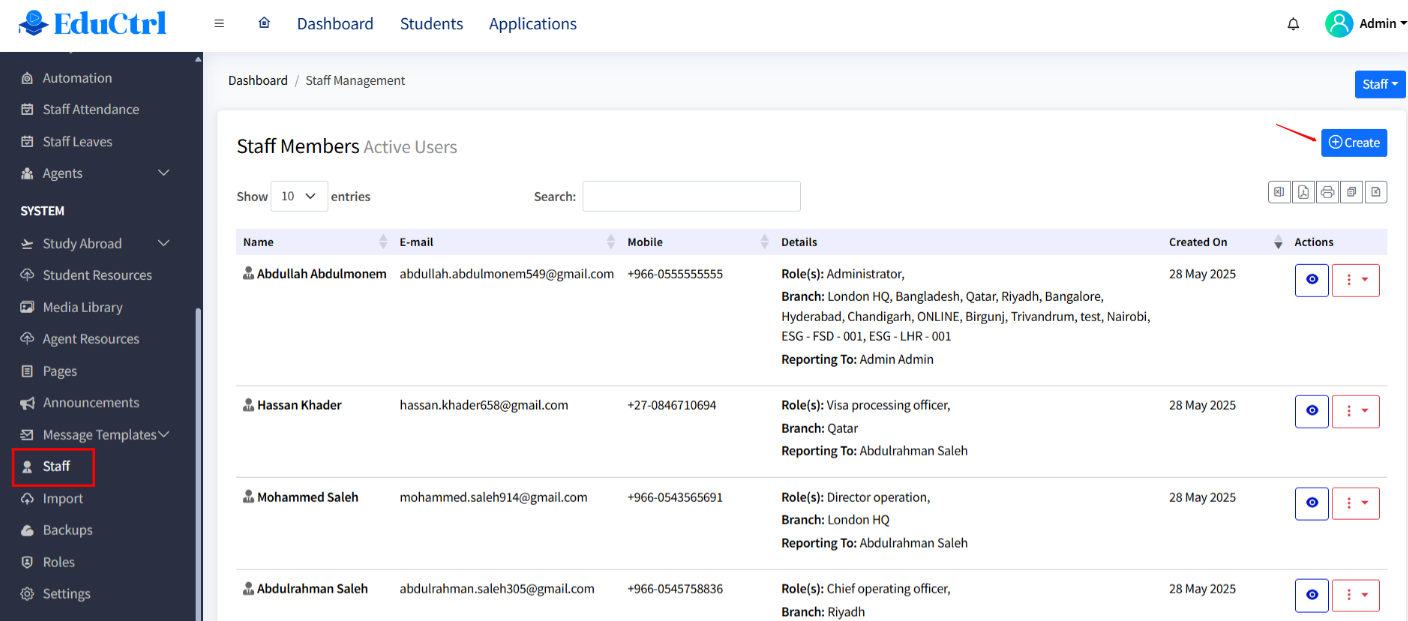
- Go to System > Staff from the left-hand menu.
Click +Create to open the Staff Creation form.
Fill out the required fields:
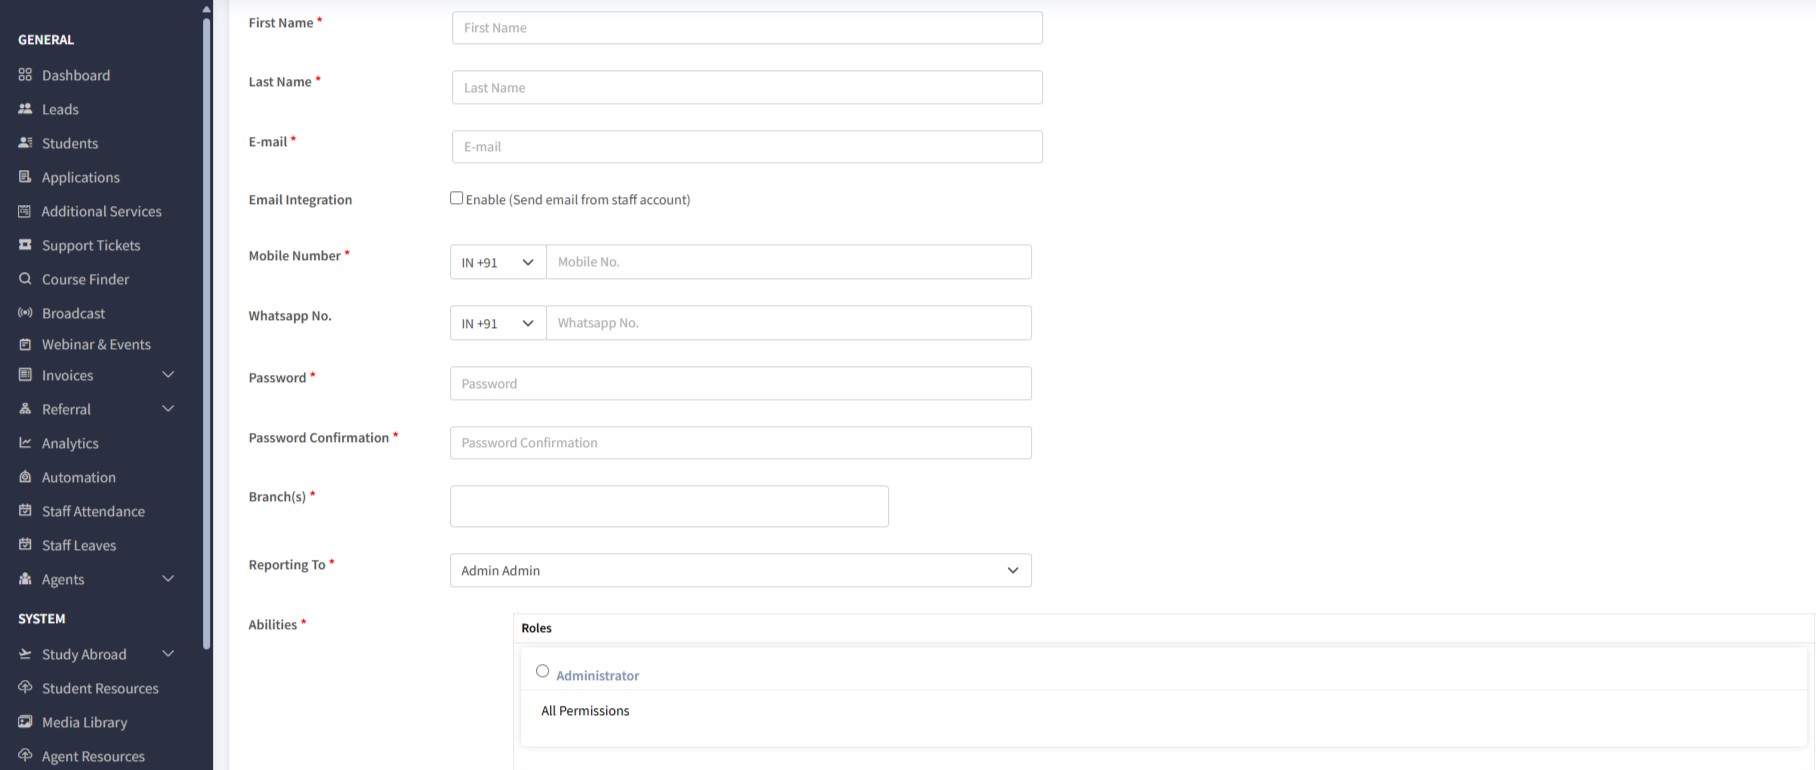
- First Name
- Last Name
- Email Address
- Mobile Number
- Password and Password Confirmation
- (Optional) To allow the staff to send emails directly from the CRM:
- Enable the Email Integration checkbox
- Enter SMTP Host, Port, Encryption, and Password or Google App Password
- (Optional) Add WhatsApp Number
- Select the Branch or Branches the staff member should have access to.
- Set Reporting To by selecting the supervisor or manager.
- Choose a Role from the list of available options such as Administrator, Counsellor, Manager, etc.
- Click Create to save the new staff account.
B. Managing Staff Accounts
- Go to System > Staff to view all staff members.
- Each staff member has the following available actions:
- Edit – Change details or assigned roles
- Change Password – Reset login credentials
- Login as Staff – Access CRM as the staff user
- Email, SMS, WhatsApp – Send direct messages
- Deactivate – Temporarily disable the account
- Activate – Reactivate a deactivated account
- Delete – Soft-delete the account
- Delete Permanently – Remove the account permanently from the system
C. Setting Role-Based Permissions
Every action a staff member can take in the CRM depends on the permissions set in Role Management. Without proper permissions, staff will not be able to view or interact with those modules.
To configure permissions:
- Go to Settings > Role Management
- Click Edit next to an existing role, or click +Create New Role
- You will see a detailed list of CRM modules and their actions. Set permissions as needed. Examples include:
- Lead Management
- View Leads
- Lead Create-Update
- Lead Assignment
- Student Management
- View Students
- Manage Students
- Student Assignment
- University Applications
- View Applications
- Manage Applications
- Application Assignment
- Delete Visa Service Application
- Staff Management
- View Staff
- Edit Staff
- Staff Attendance
- Approve Leaves
- Agent Management, Commission
- Course Finder
- Invoices, Edit Invoice
- Ticket Assignment
- Mail Templates
- Broadcast To Staff many more.
- Lead Management
- Turn on only the permissions relevant to that role.
- Click Save to apply the changes.
Note: If a permission is not enabled, the related section or action will not be visible to the staff user.
For example:
- If a staff role does not have lead permissions, the Leads module will not appear in their menu.
- If the staff does not have message permissions, Email/SMS/WhatsApp buttons will be hidden.
Best Practices
- Create specific role templates like Counsellor, Visa Officer, or Sales Executive based on job responsibilities.
- Use the View Assigned Data Only permission to limit access to leads, students, or applications assigned to the user.
- Always assign a Reporting To manager to every staff member for supervision.
- Test roles by assigning them to a test staff account and using Login as Staff to verify access.
